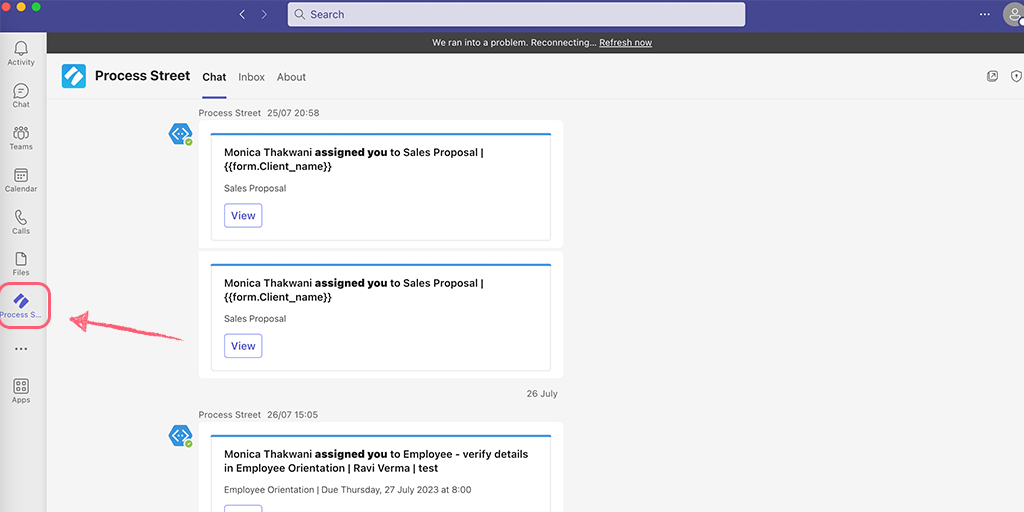
You can assign users and groups to tasks in your workflow runs, which effectively gives them responsibility for those tasks.
This is a great way to ensure that the right team member is working on the appropriate tasks.
When a workflow is run with task assignments built-in, or when someone is assigned to a task in an active workflow run, they will be sent an email notification informing them that they have been assigned and that those tasks are ready to work on.
Users: In order to edit workflows, you must be an Administrator or a Member who has been given ‘edit’ access by your Administrator.
There are two ways to assign users to tasks:
You can pre-determine the users or groups assigned to a task when you’re editing your workflows. This means that whenever a workflow is run, the preset users will be automatically assigned and notified.
You can pre-assign tasks to admins, members, groups, and Guest (Internal).
Note: Guest (External) cannot be pre-assigned to tasks in workflows as they have limited access by design. If they are needed to work regularly in your Process Street organization, they can be promoted to a Guest (Internal).
To do this, first, find the workflow in your library, click its name then click “Edit” in the top-center of your screen.
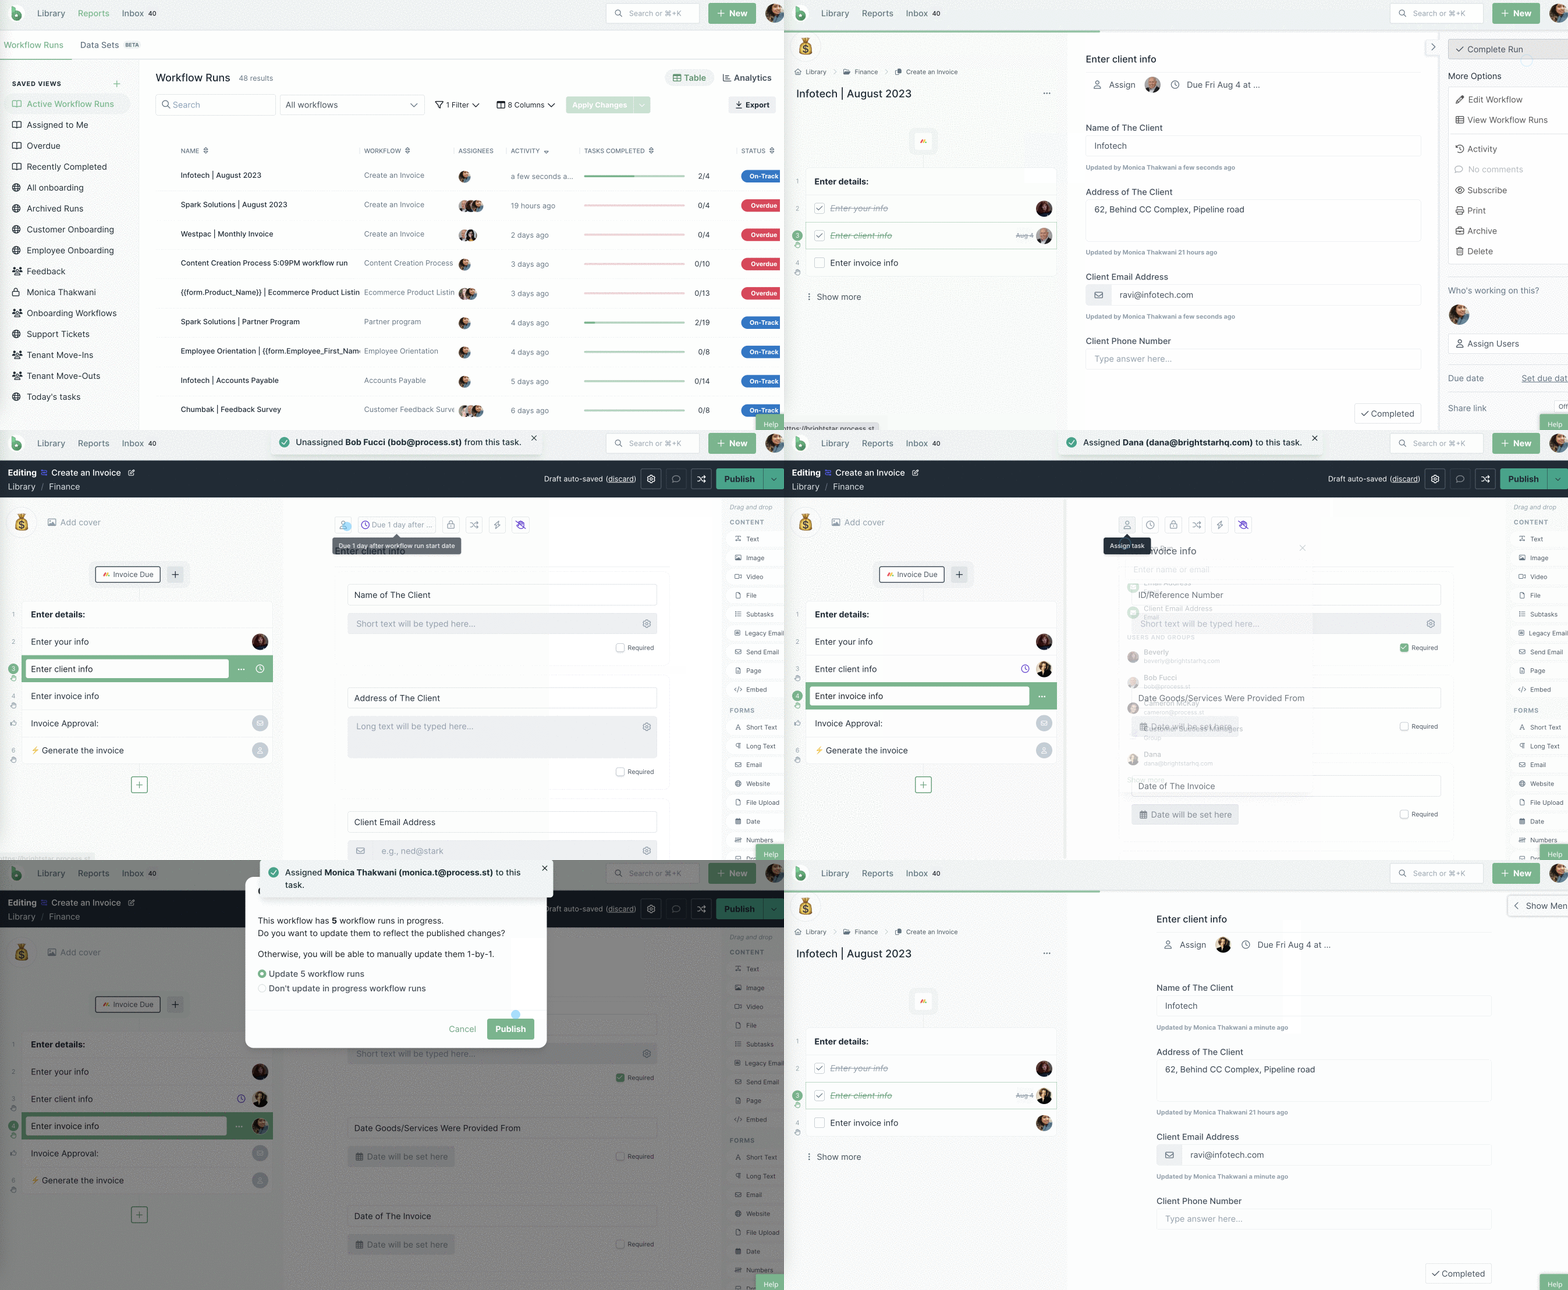
Next, click on the task you want to pre-assign users to and then click the “Assign” button at the top center of your screen. Search for the user(s) and/or group(s) you want to assign and click their entry to assign them to the task, as shown above.
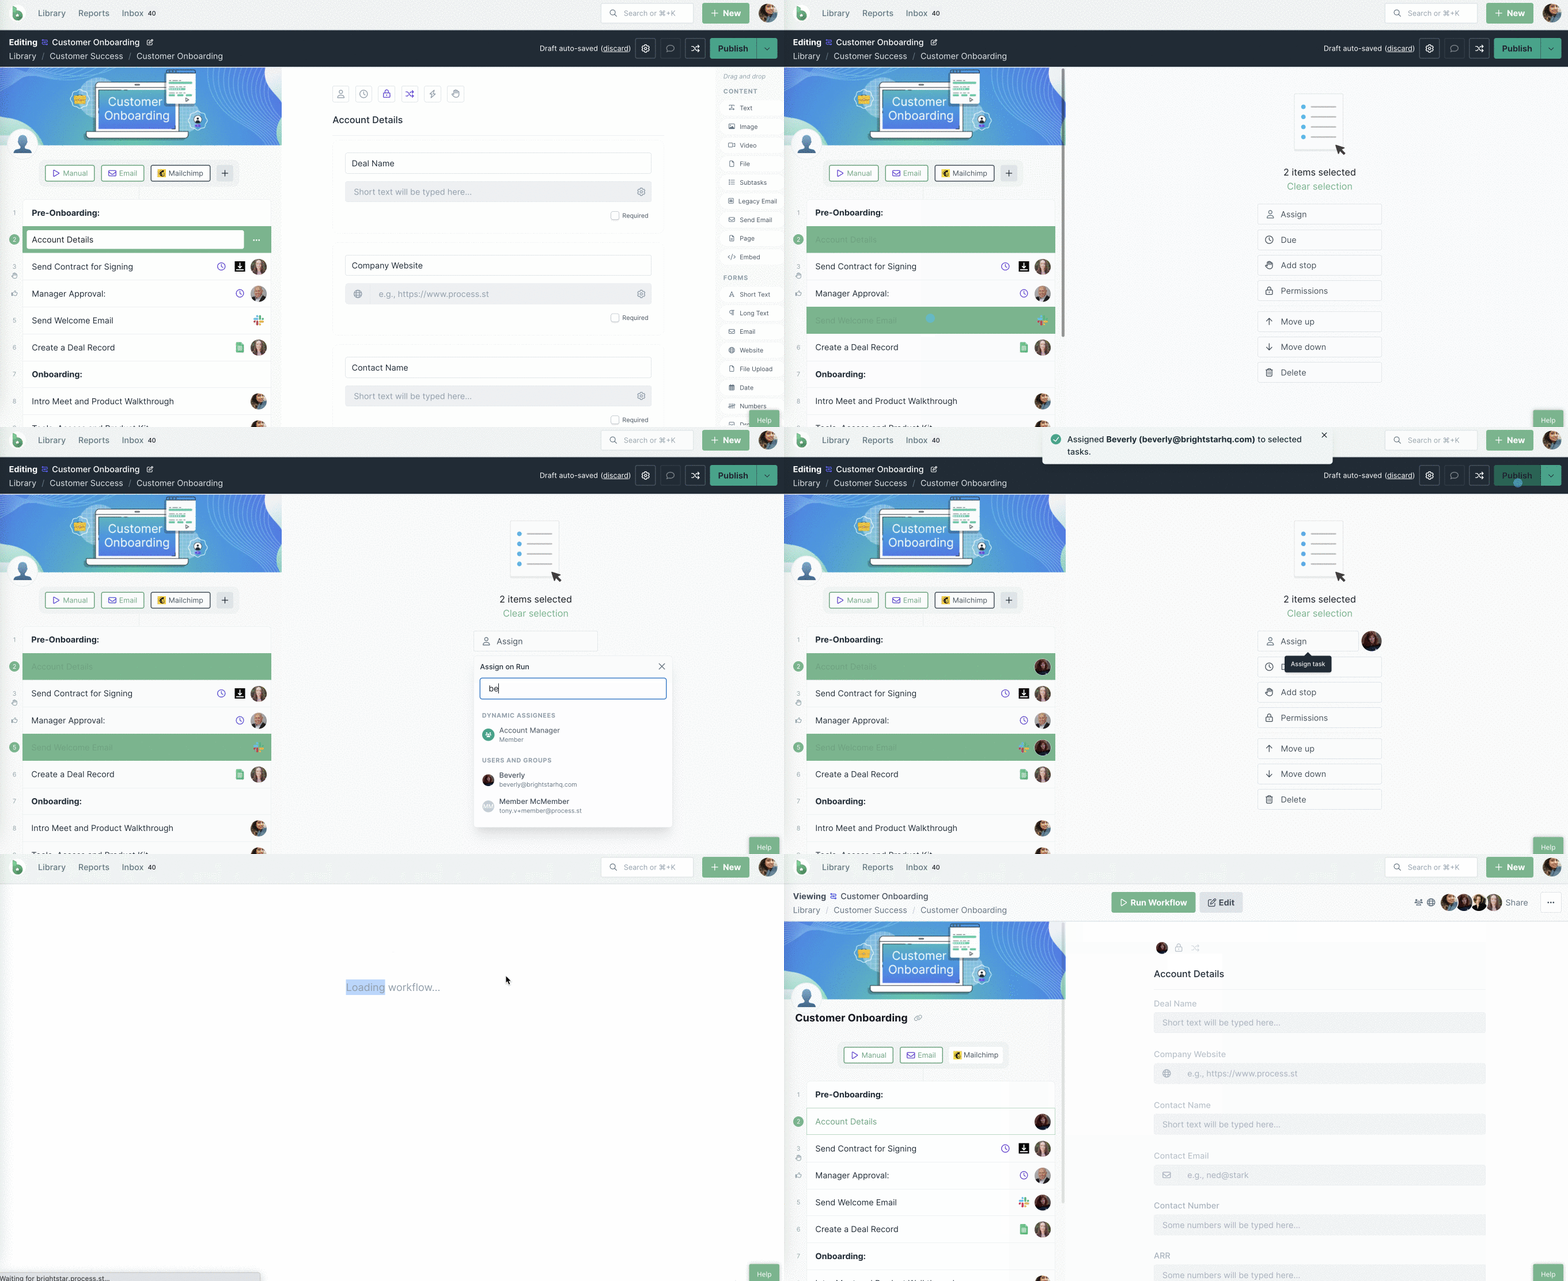
Pro Tip: To select many tasks in one go, select the first task and hold down the “Shift” key (Windows & MacOS). Now select your last task to add assignees to, and all the tasks in between will become highlighted. Or press and hold the “Command or Ctrl” key then click on individual tasks to select them independently.
You can then click the “Assign” button in the center of your screen to add the same assignee to each of those tasks, as shown above.
Once you’re happy with the assigned users, “Publish and run” your workflow to see the new assignees in it.
You can add, remove, or change your task assignees in your workflows and these changes will be reflected in any active workflow runs, as shown below.
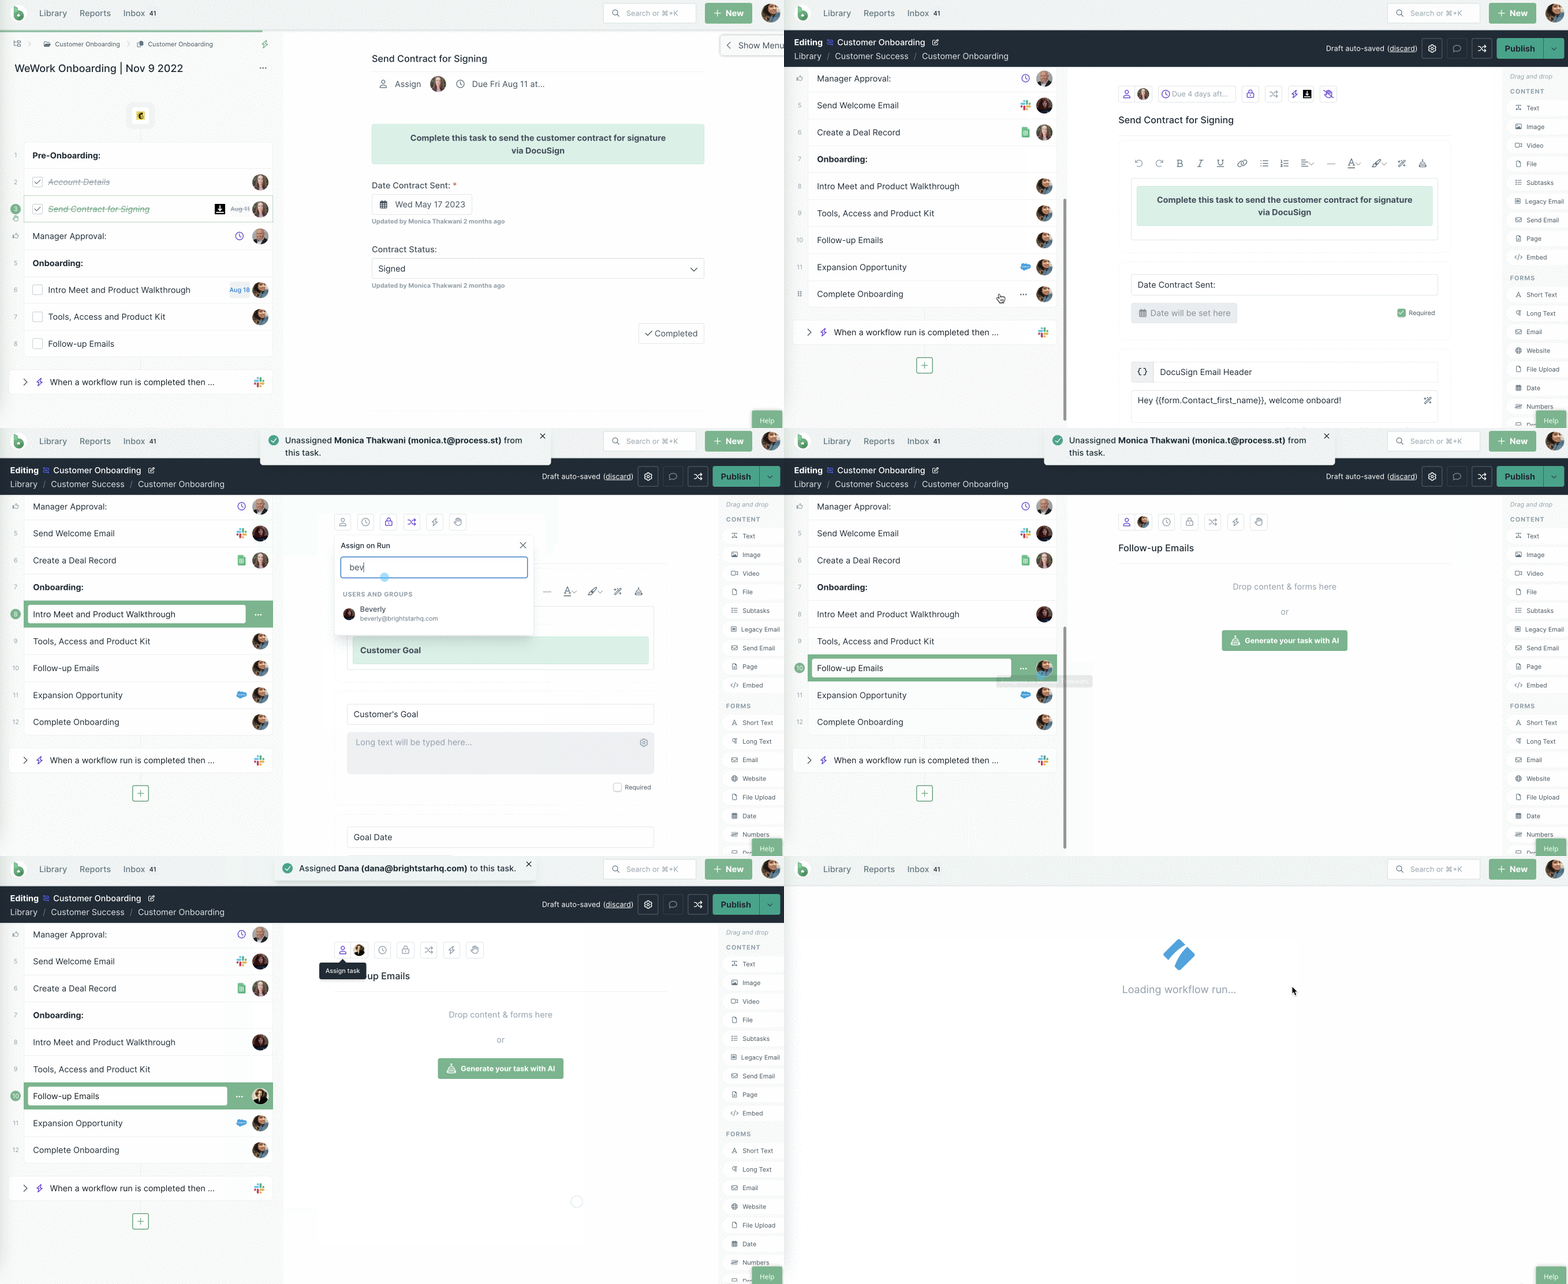
Note: If you don’t want to change the assignees in all your active workflow runs, you can choose to manually update your active runs on a need-to-update basis. Learn more about what updates when you publish changes.
You can also pre-set dynamic due dates in your workflow, meaning that when a workflow is run everyone who needs to take action will be instantly assigned and due dates set, according to your settings.
To assign users (or groups) to the tasks in a workflow run that is already active, you need to first find an active workflow run.
You can search for workflow runs in either your Reports tab or via links in your Library or folders. In the example below, we’re starting in Reports and choosing a workflow run from the default saved view “Assigned to Me“.
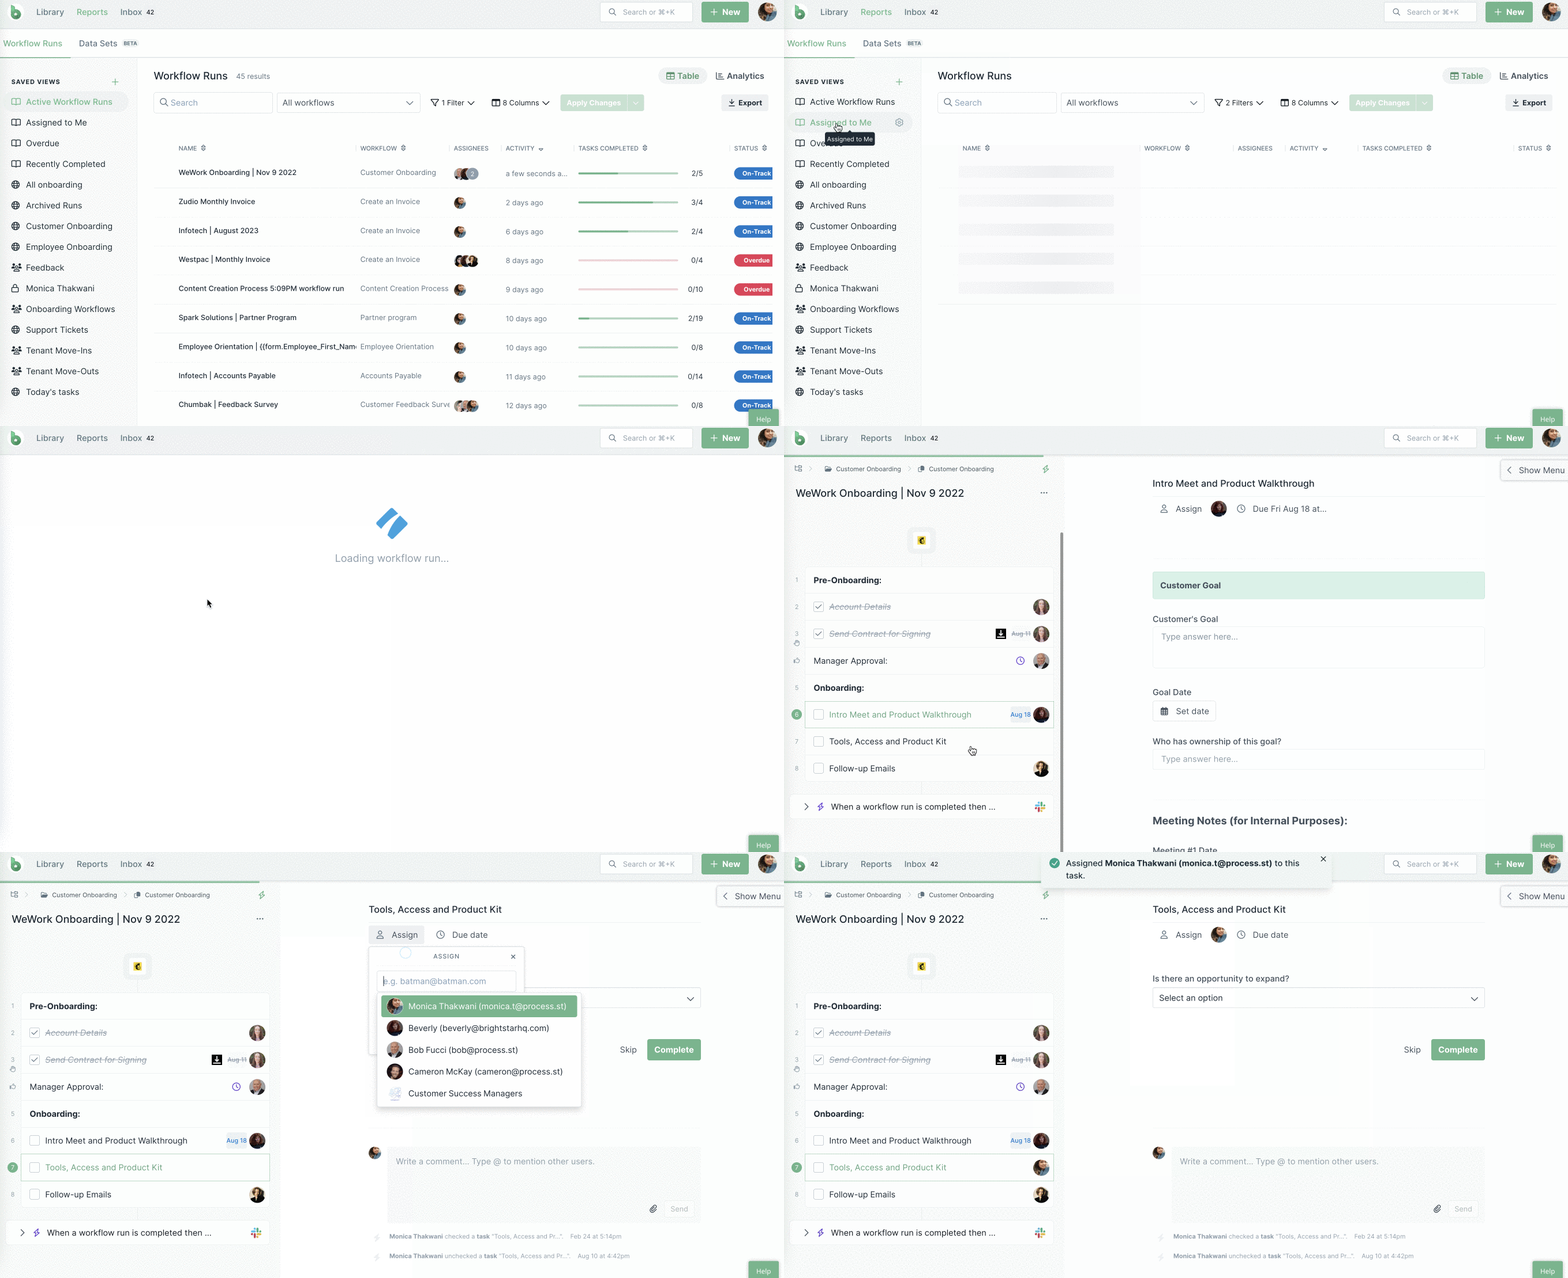
Click on the name of your workflow run to open it and then click on the task you want to assign a user to.
Next, click the “Assign” button at the top center of your screen. Use the search box which opens to search for a user or a group in your organization then click their entry to assign them, as shown above.
You can add more users or groups to the same task, so repeat this as many times as you like.
Assigning a user or group will send an email notification to that user (or all users in a group) to let them know they have been assigned to that task/s.
You can see the users assigned to a task by their profile picture or group icon.
If multiple users or groups are assigned to a task, only one image will be shown but a number will overlay the image telling you how many assignees there are.
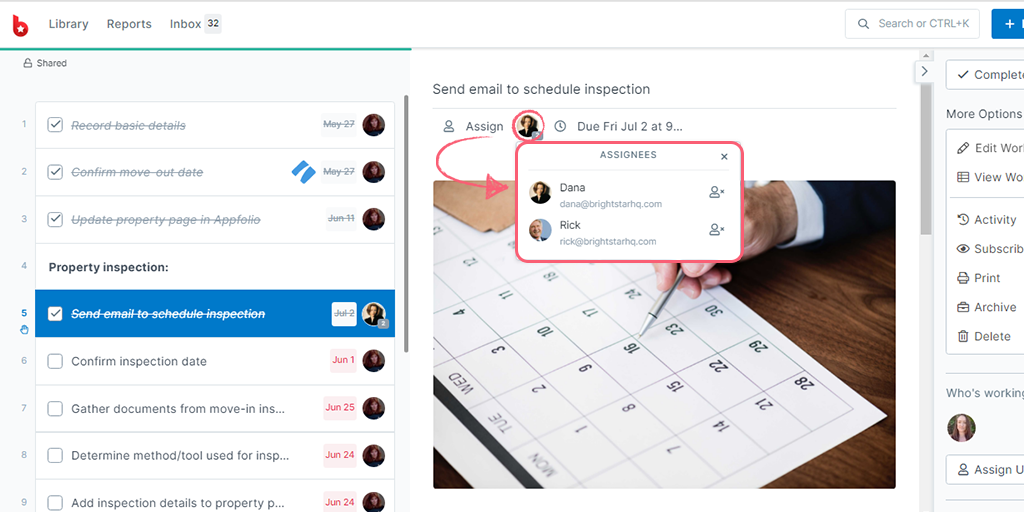
To unassign a user or group from a task you need to click on the icon for assigned users, then click the “Remove user” icon next to their entry, as shown below.
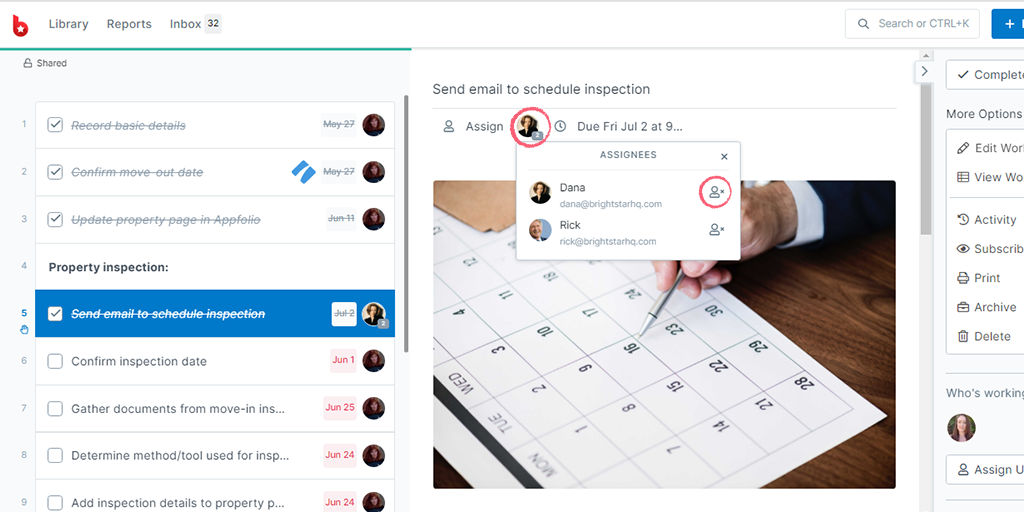
This method applies to unassigning users on active workflow runs and inside your workflow when editing it.
Optional: Once you’ve pre-assigned a user, you may also want to add a dynamic due date to the task so they get notified when it’s time to work on the task, and when that task becomes due.
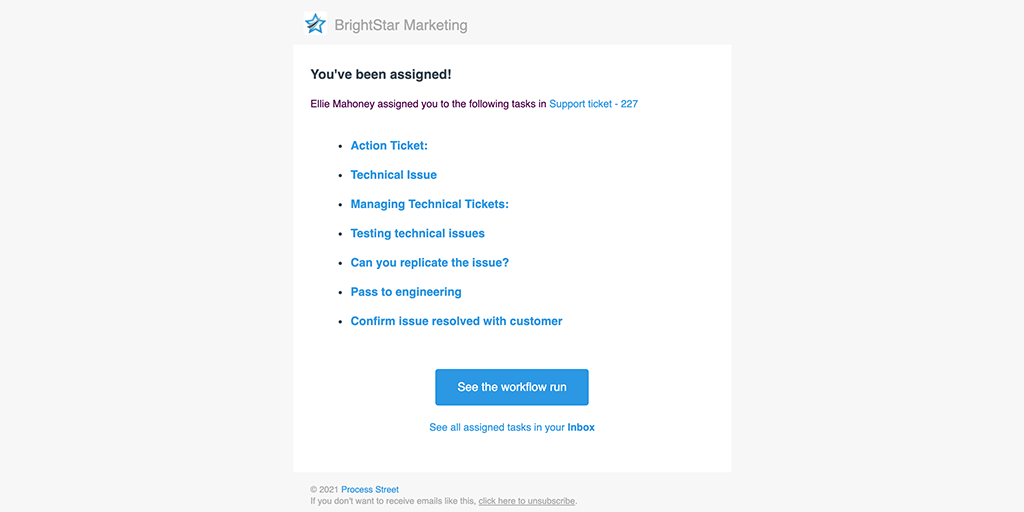
Users will receive an email notification for these events:
The email will tell them what task they are assigned to (or what task is due) and contain a link to the task, as shown below.
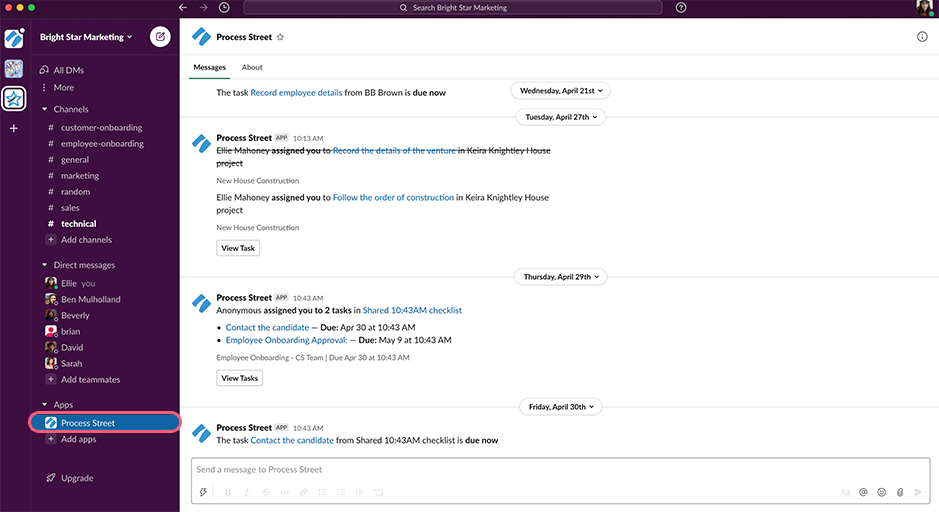
You can use our Slack app to send all your notifications to you, directly in Slack. You can also work on tasks, approvals, and complete workflow runs straight from Slack, without needing to open Process Street or check your emails.
You can use our Microsoft Teams app to receive task notifications, directly in Teams. You can also work on tasks, approvals, and complete workflow runs straight from Teams, without needing to open Process Street or check your emails.
