You can set permissions for individual users or groups on your folders.
This allows you to grant custom levels of access, or restrict access to your folders and also any workflows contained within them. Your workflows inherit the permissions you set on folders, which makes controlling permissions much simpler.
For example, you might want your accounts folder to only be accessible to your finance team but not the rest of your team, or your HR folder to be accessible only to your HR director, or your sales and customer success teams to have shared access on each of their team folders.
Users: In order to manage folder permissions, you must be an Administrator or a Builder who has been given ‘edit’ permission by your Administrator.
View all permission levels by feature.
Start from your Library then navigate to the folder you would like to set permissions on. If you don’t have a folder yet you can learn how to create folders and sub-folders.
Next, click the “Permission Icons” next to your folder’s name.
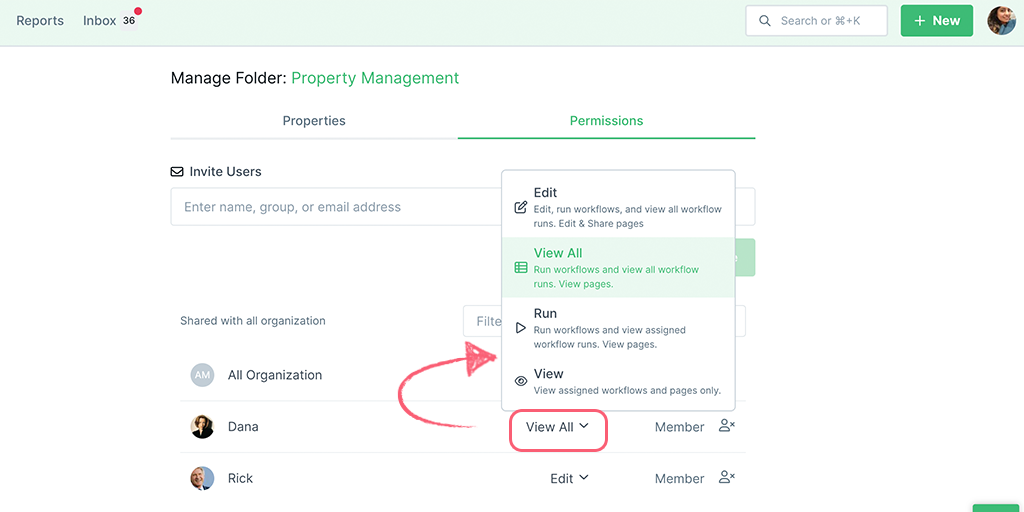
You will be taken to the “Permissions” tab of your folder’s manager. Here you can see any current users and groups assigned to your folder, along with their permission level, as shown above.
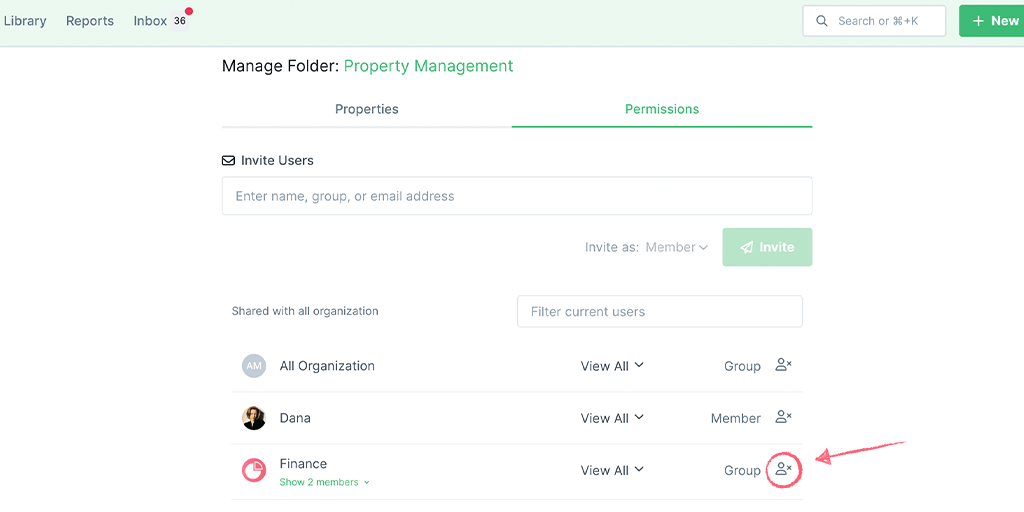
Note: If it’s the first time you’ve visited this page, you will see the “All Organization” group. This is a default group that is assigned to all folders and having this group assigned means that all admins and builders can see your folder and the workflows within it. You can remove this group if you want to restrict access to only selected users or other groups.
Start typing a user’s email address (or a group’s name) to give them access to your folder. If they are already part of your organization their name will appear from a list and you can click their details to add them.
The default permission setting is applied once they are added. Use the dropdown shown below, to select or change their permission level. The current selection is highlighted, so to change permission, select one of the remaining fields.
If you’d like to invite a user who is not already part of your organization, you can enter their email address and click “Invite“.
Remove a user or a group from a folder by clicking the “Remove User” icon at the far right of their entry in the members tab of the folder manager.
This action restricts their access to your folder and the workflows contained within it, so they can no longer see that folder in their library.
Note: The permission level set for individuals and groups on the main folder will apply to any sub-folders created and housed within that folder, and any workflows created and housed within those folders. Folder permissions may affect workflow permissions, depending on how you have set them.
Learn more about creating and managing folders and the different levels of user permissions.
Help us improve this help center.


