You can integrate Process Street with Slack, using Process Street’s Automations.
This integration allows you to send instant automated messages to a Slack channel, either when a task is checked or when a workflow run is completed.
Users: In order to create or update Automations, you must be an Administrator or a Builder with “edit” permissions.
First up, you’ll want to add a Snippet form field into the workflow you are going to create an automation for. This allows you to combine static and variable fields into a message which you will use later in this automation.
Give your snippet a name in the label field, create the content of your message and Publish changes to your workflow. Use the magic wand icon to add variables into the body of your message.
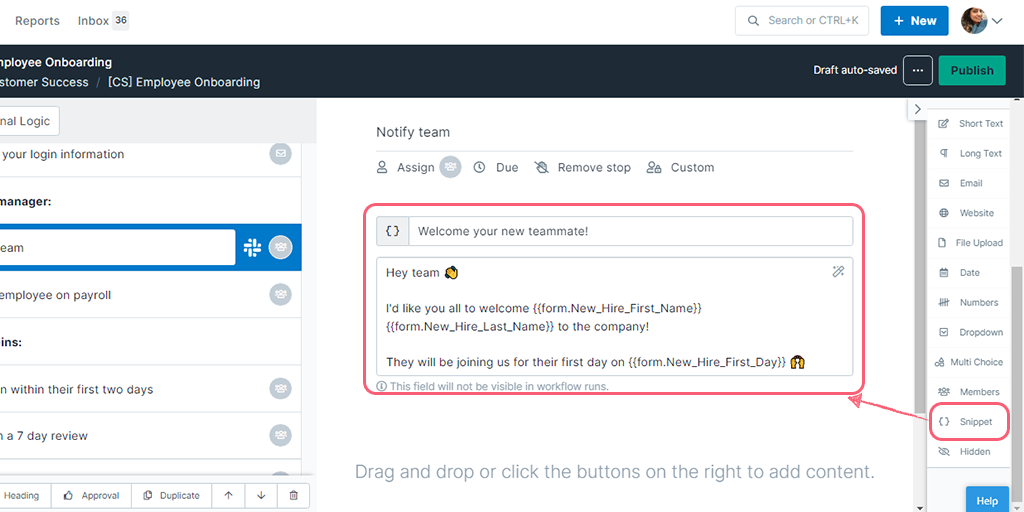
Pro tip: You can add formatting to your snippet message, @mention users, create hyperlinks and add emojis. Learn more about formatting for Slack.
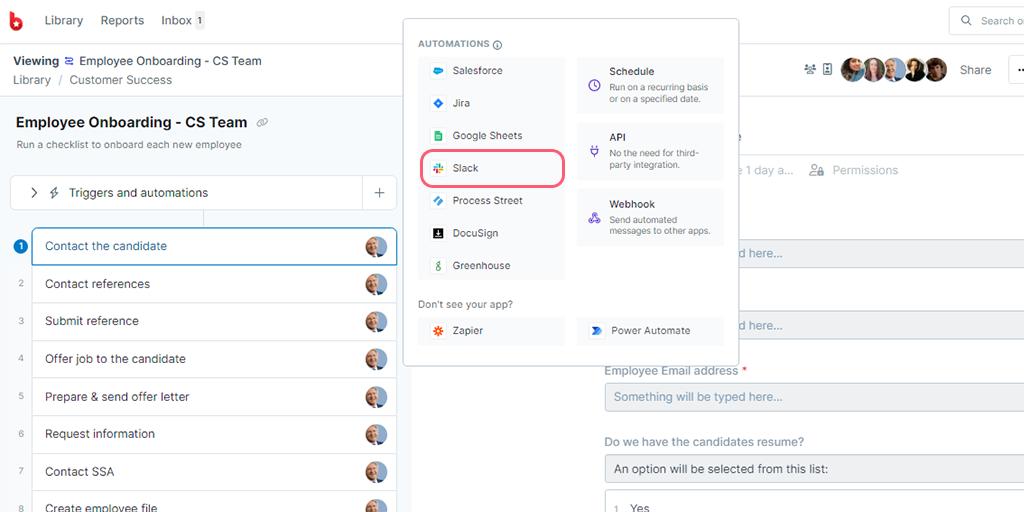
Once you’re done editing, click your workflow’s name to open it in view mode, and you will see the “Triggers and Automations” button below the workflow name, as shown below.
Start by selecting Slack as the trigger for your automation, from the automation modal.
For Slack automations, you can choose from these two triggers:
Click the + button on your chosen trigger to get started.
Let’s walk through examples for each of these triggers and their respective actions.
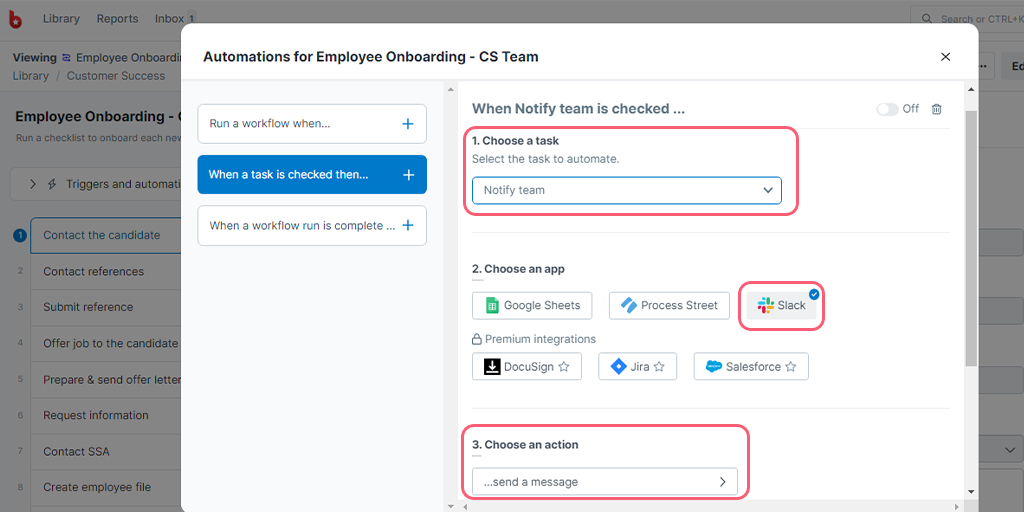
In this example, completing the task “Notify team” in our employee onboarding workflow run, sends out a message to our “employee onboarding” channel in Slack.
Next, click the Slack icon.
Start by selecting the task in your workflow that will act as your trigger.
Select the action “send a message”.
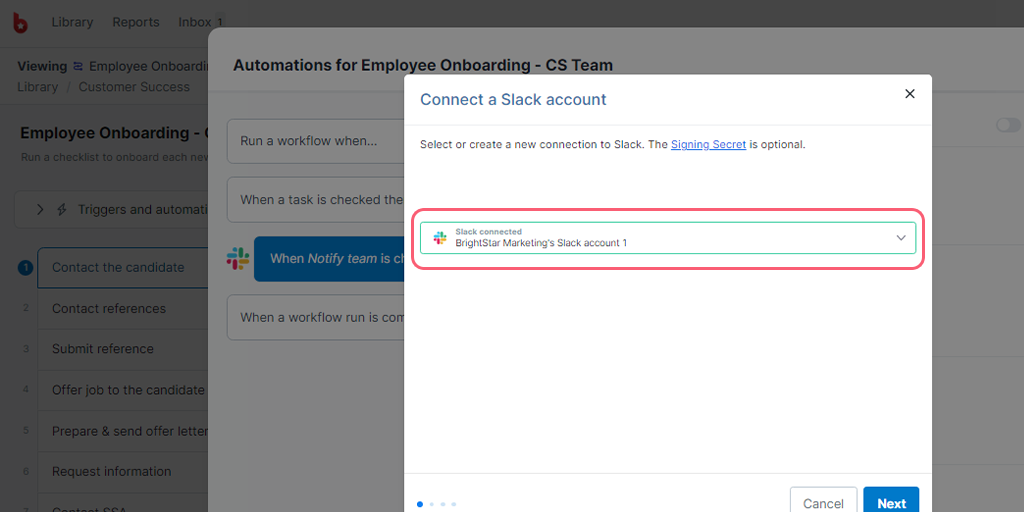
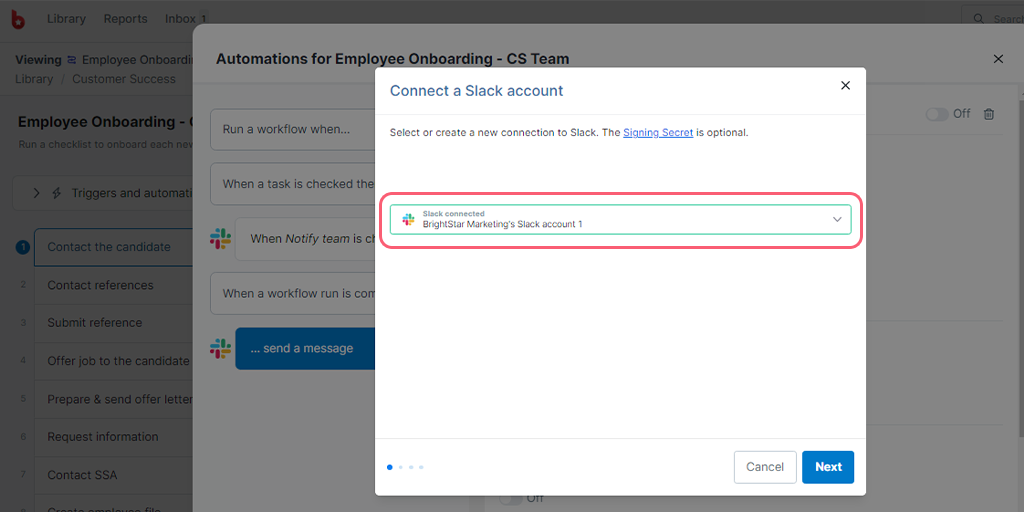
When you select your chosen action, a pop-up window will appear and you will be prompted to choose an account to run your automation through.
If it’s the first time you are connecting to Slack via Process Street, click “New authentication” and another pop-up window will appear for you to be able to create your authentication. When you’ve connected, you’ll see a notification confirming this.
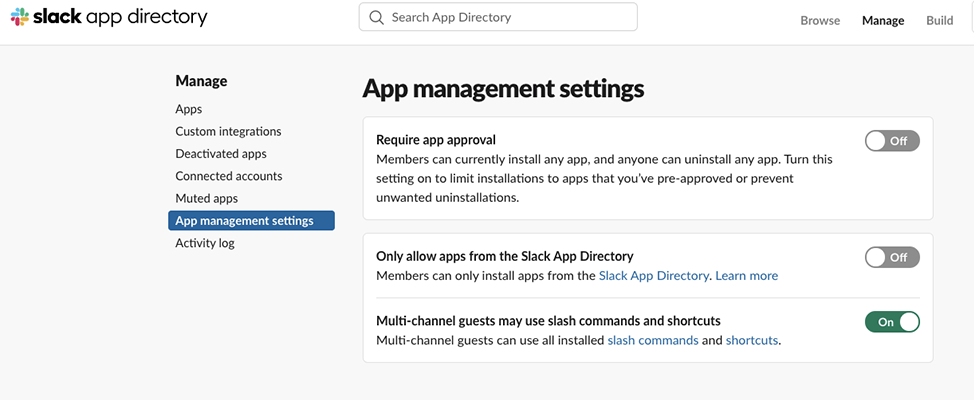
Note: You will need to disable pop-ups blockers to allow you to authorize an app. If you are unable to add the app, you may need to ask your IT team or workspace owner to install it for you or have them change the workspace permissions to allow you to install it.
If you already have an account connected, then you can continue with the one shown, or select another account to add.
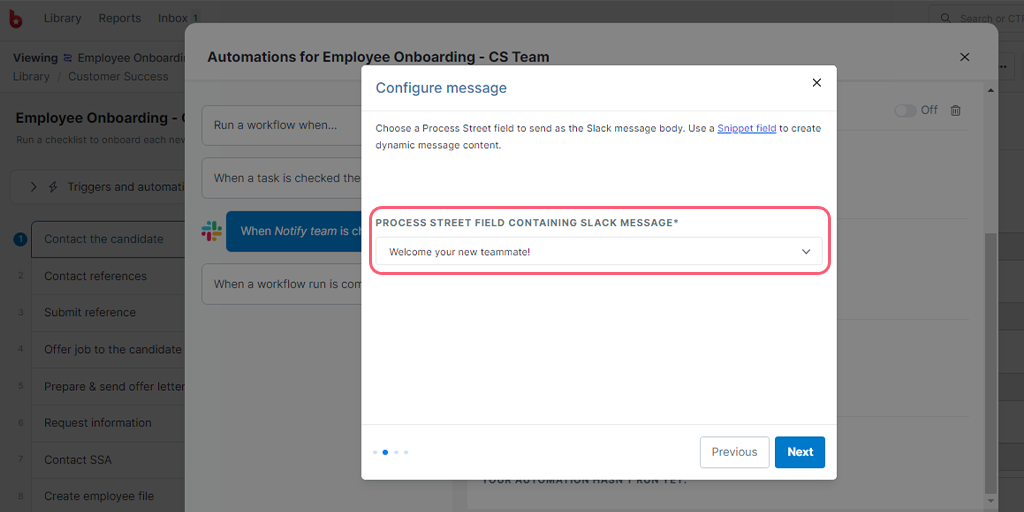
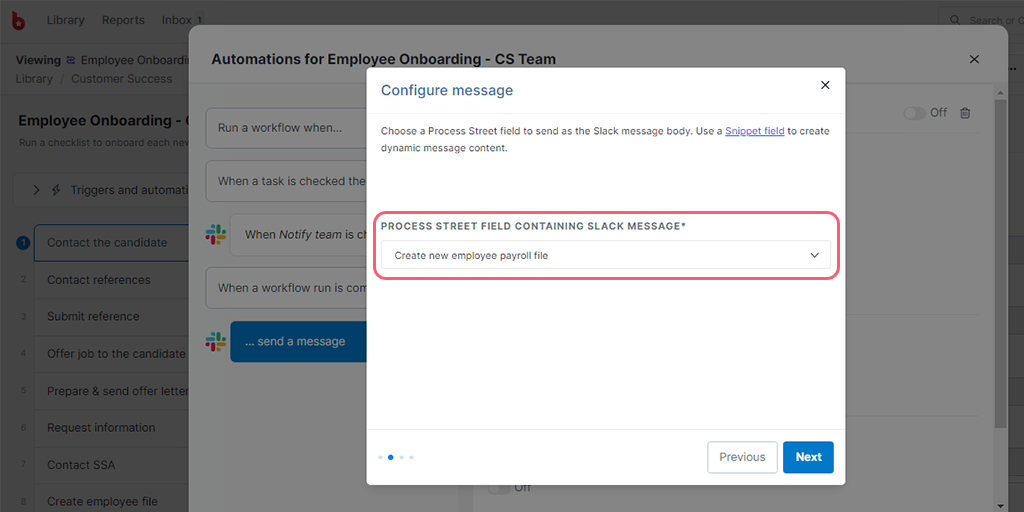
Next, you’ll be asked to select the field containing the body of the message you’d like to send in Slack. Search for the name of the Snippet form field that you added to your workflow earlier. Click “Next“.
Select the channel you would like to post your message into.
Select to send the message either as yourself (as the authenticated user) or as the Process Street bot .
When you’re done, click “Finish”.
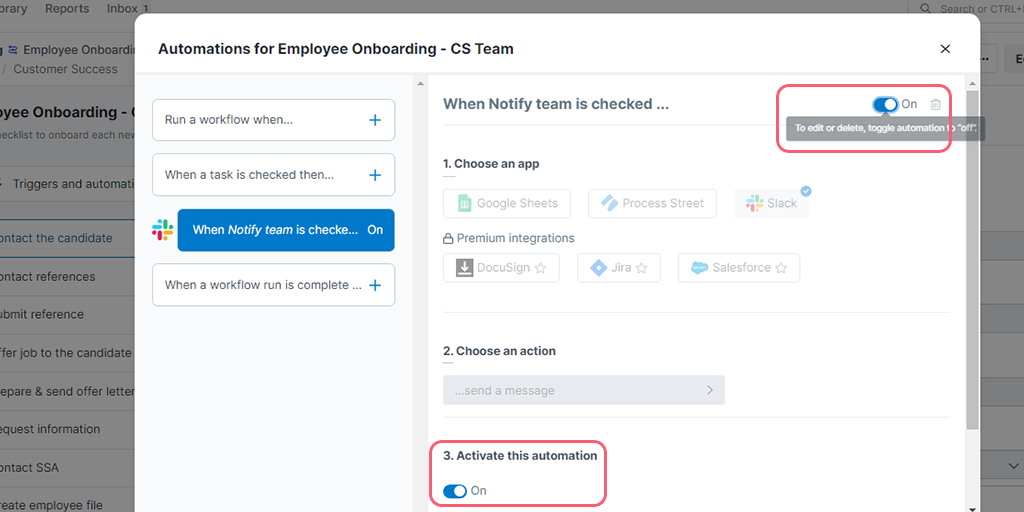
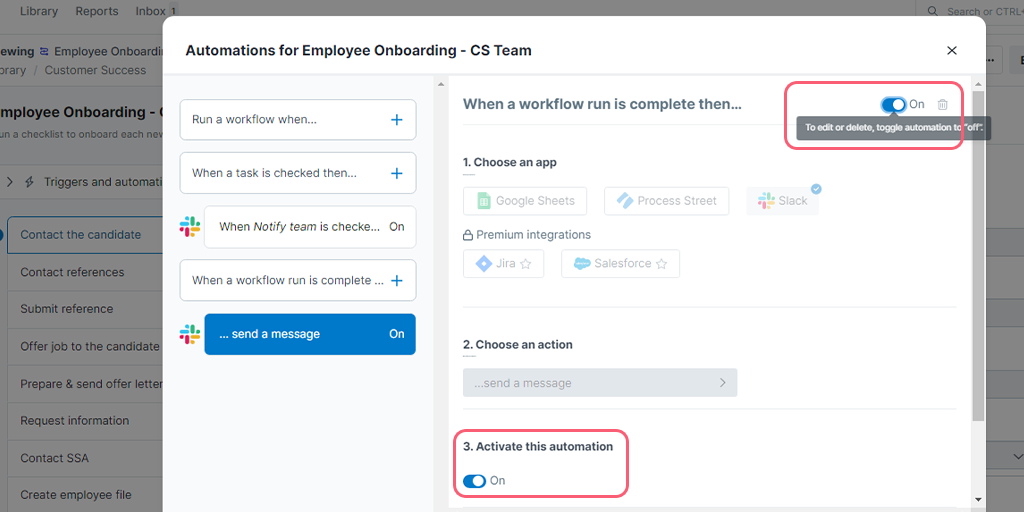
Now you’re ready to turn on your automation. Use one of the toggle switches shown below, to switch it on.
Now every time your task is checked in your workflow run, an instant message will be sent to your chosen Slack channel.
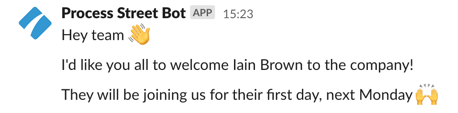
In this example, completing a workflow run from our employee onboarding process sends a message to our finance team to ask them to add the new employee to payroll.
Create a snippet for this message in your workflow (adding a highlighted text note into your workflow, as per the example below, is optional).

Publish changes to your workflow and navigate to “Triggers and Automations” tab.
Next, click the Slack icon.
Select “When a workflow run is complete” from the automation modal.
Select the action “Send a message”.
When you select your chosen action, a pop-up window will appear and you will be prompted to choose an account to run your automation through.
If it’s the first time you are connecting to Slack via Process Street, click “New authentication” and another pop-up window will appear for you to be able to create your authentication. When you’ve connected, you’ll receive an email notification confirming this.
Note: You will need to disable pop-ups blockers to allow you to authorize an app.
If you already have an account connected, then you can continue with the one shown, or select another account to add. Click “Next“.
Select the field containing the message you’d like to send in Slack. Use the Snippet form field that you added to your workflow earlier.
Select the channel you would like to post your message into.
Select to send the message either as yourself (as the authenticated user) or the Process Street bot .
When you’re done, click “Finish”.
Now you’re ready to turn on your automation. Use one of the toggle switches shown below, to switch it on.
Now every time your workflow run is completed, an instant message will be sent to your chosen Slack channel.

If you’re looking to create a really robust integration with Slack, you might also consider using our Slack app, which allows you to work on tasks and complete workflow runs without needing to have Process Street open.
To be able to edit the fields you have mapped in your automation, or change the triggers or actions, you first need to turn off your automation using one of the toggle switches.
To remove an automation from a workflow, you can delete it, but first, you will need to ensure that it has been switched off. Turn the toggle switch to the “off” position and then click the trashcan icon in the top right of your view to delete the automation.
There are no filters, delays, or formulas built into automations at the moment. To be able to utilize these types of functions, you might want to consider using a Zapier integration instead.
If you would like to request that we add another app to our automations, you can do that from the help button in the bottom right corner of your screen. Click “Suggestions” and send us your request.
If your automation stopped running, isn’t working as expected, or is showing errors, there might be a few reasons for this. Please check the following:
You can check your automation run logs to see how your automations are running, or check for errors. You will find the automation run logs in two places, on your workflow or on workflow runs.
In your workflow on the automations tab, select an existing automation from the left side of your screen (highlighted in blue below). At the bottom of your page, you will see a list of all of the automation runs for that workflow. If your automation hasn’t run yet, you’ll see something similar to the below.

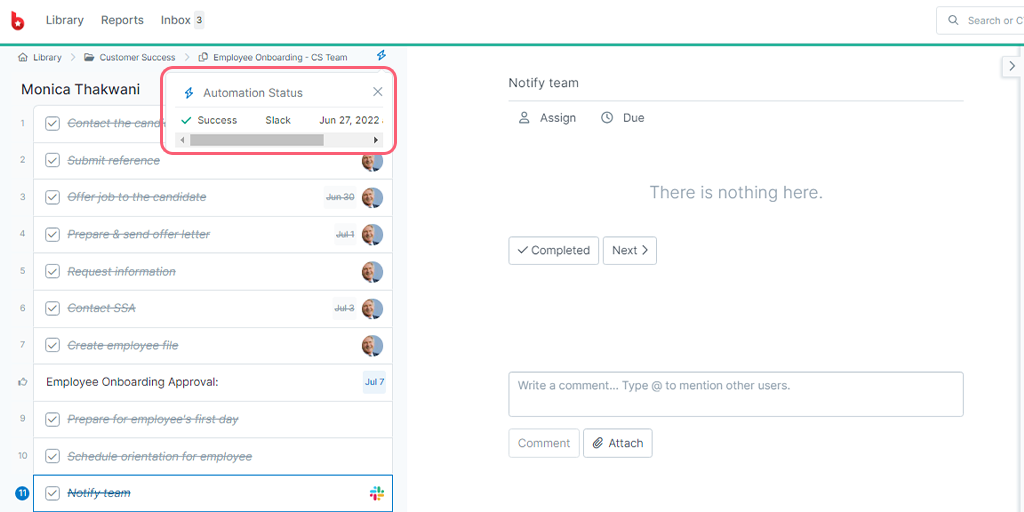
In a workflow run, in the upper right-hand corner of your task list, you’ll see the lightning bolt icon ![]() . Click the icon to see the run logs for that particular workflow run.
. Click the icon to see the run logs for that particular workflow run.
If you have any errors, click the word “Error” to expand more information on why your automation didn’t run.
The lightning bolt icon will only show up on workflow runs that have automations configured on them. This is an automation’s idle state.
When an automation is running, you’ll see the bolt change to the ![]() icon.
icon.
Once the automation finishes running, you’ll see either ![]() for success or
for success or ![]() for failure. If it’s a failure, you can click on the X to see the run logs and then click on the “Error” log for more information.
for failure. If it’s a failure, you can click on the X to see the run logs and then click on the “Error” log for more information.
If you have any questions about using Automations, please reach out to our Process Pros team.
Help us improve this help center.


