
You can integrate JotForm with Process Street workflow runs using Zapier.
This allows you to have workflows run automatically when you receive a new JotForm submission. By setting up this particular integration, it will save you from having to manually transfer critical data, in addition to having to run a Process Street workflow yourself.
Users: In order to create an API key for integrations, you must be an Administrator.
Let’s get started.
You will need the “IT Support Process” workflow added to your account for this to happen.
Add the workflow to your account either by clicking the above hyperlink or pressing “Edit checklist” on the embed below.
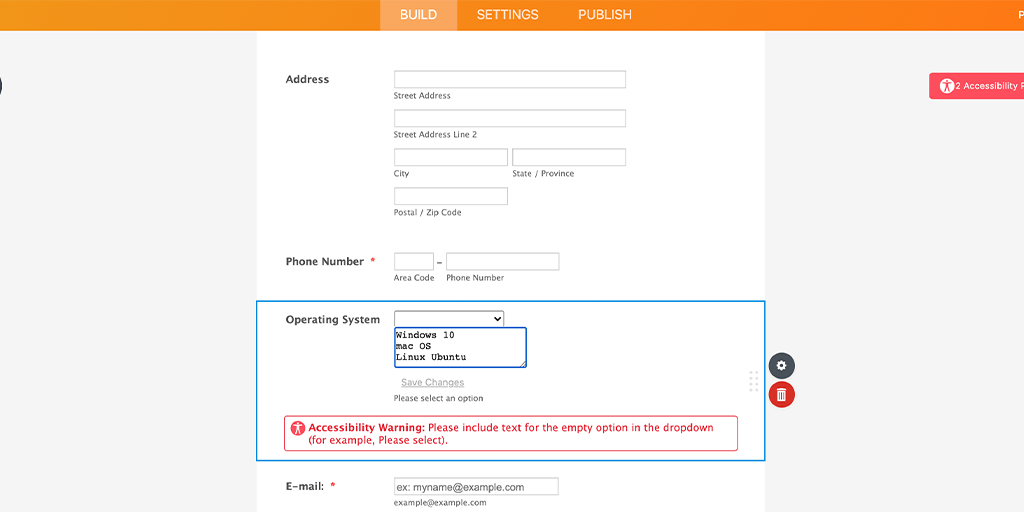
For this use case, you can use the free JotForm template “IT Service Request Form-2“. You should add a dropdown field to this template titled “Operating System“, with three options to choose from – Windows 10, macOS, and Linux Ubuntu.
By adding the extra “Operating System” field, more integral data can be pushed from the JotForm form through to your Process Street workflow run. (You can add or remove additional fields in both the JotForm template and the Process Street workflow to suit your own requirements.)
Zapier is a tool that connects over 2,000 apps together, helping you to automate your processes and workflows with “Zaps”.
A “Zap” is the fully-built automation that will run in the background and carry out your recurring tasks for you.
After making an account or signing into Zapier click “Create Zap“.
Type in and select JotForm as the trigger app and “New Submission” as the trigger step.
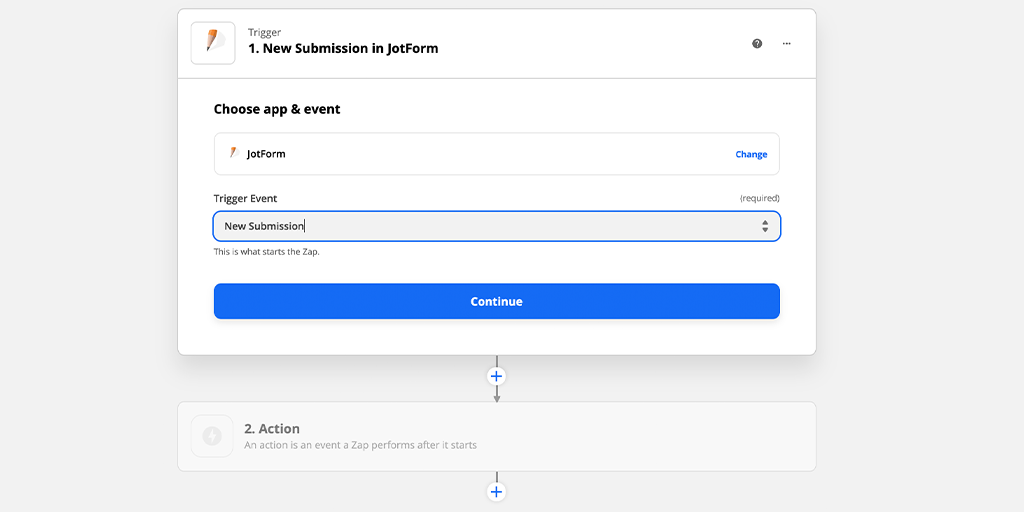
Click “Continue” and sign in to your JotForm account.
Select the appropriate answers regarding HIPAA compliance and the data center.
You will then be taken to a new screen that tells you what JotForm will gain access to. Click “Allow“.
Add the “IT Service Request Form 2” template to your JotForm account and include an “Operating System” dropdown field with answers as shown below.
Then, submit a test form with all the details filled out, so that Zapier has access to sample data for your next step.
In Zapier, select the form you’re using to set up your trigger.

If you don’t see your form listed here, please check your data center options in Jotform.
Click “Continue” and test your trigger.
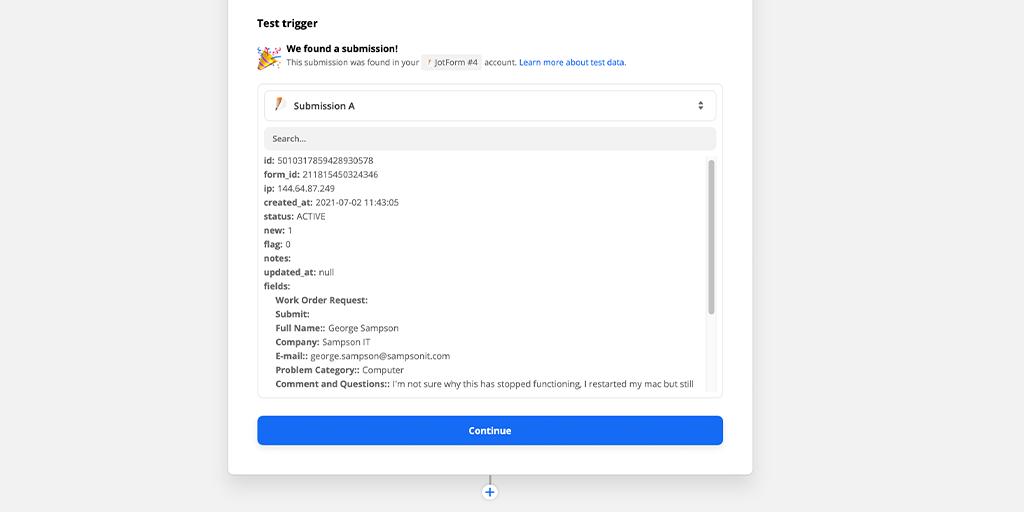
Once pulled through, your first sample will be titled “Submission A”. Click “Continue” and move on to setting up your action step.
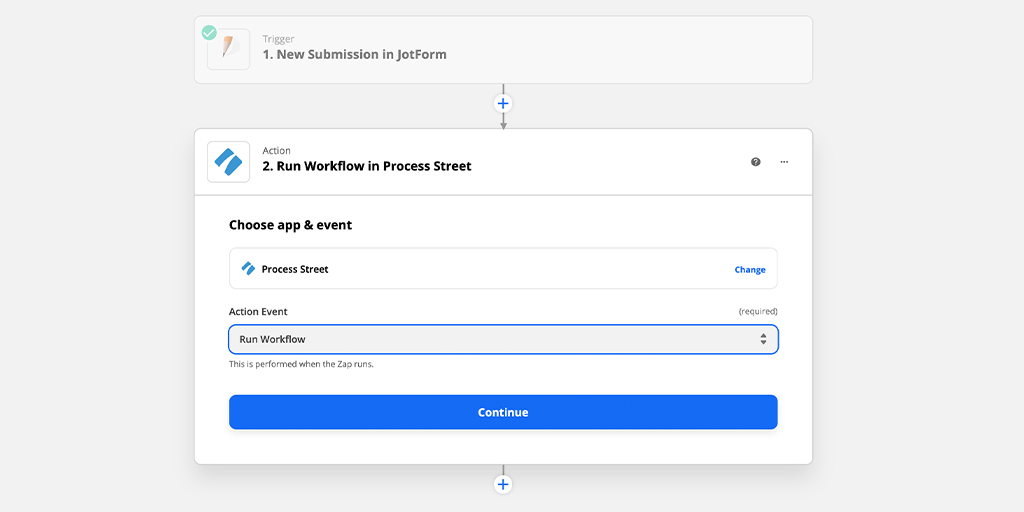
Select Process Street as your action app and “Run Workflow” as the action event.
If you haven’t given Zapier access to Process Street before, do so now.
To connect Zapier with Process Street, you need to add the API key. The API key can be found by clicking on your organization’s name in the top right-hand corner of the Process Street app, then clicking on the “Integrations” tab.

Once Zapier has been given access, your screen should look similar to the screenshot below.
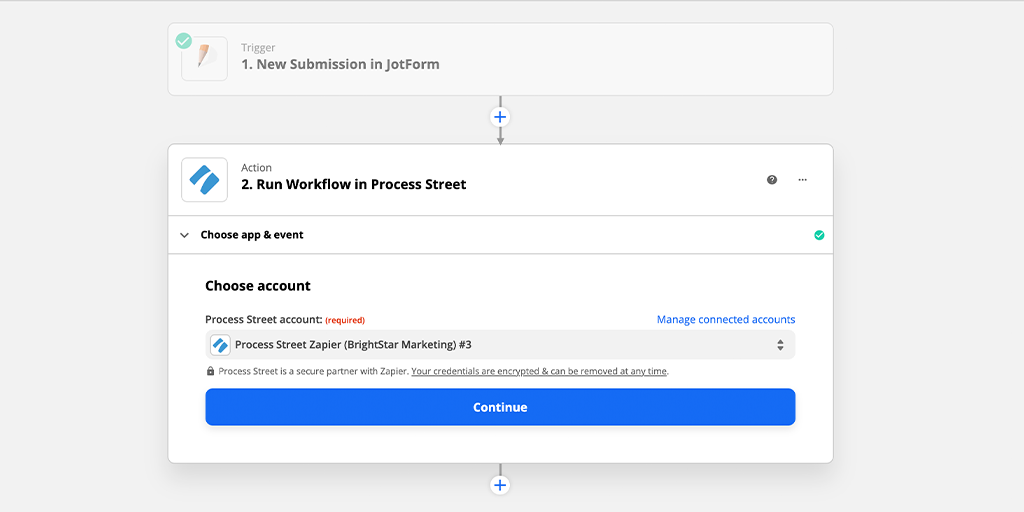
Click “Continue“.
The next step is to push JotForm data through to Process Street via Zapier.
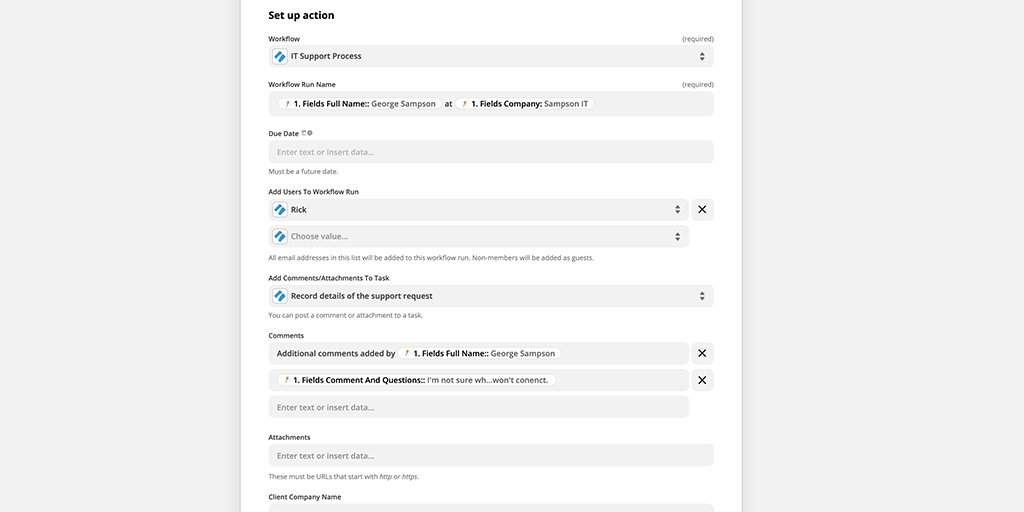
Under the workflow field, select “IT Support Process” from the dropdown.
For the Workflow Run Name field, choose “Fields Full Name” and “Fields Company“, and add a manually written “at” between them. This will help you to see who has submitted the form, and which company they belong to.
For the Add Comments/Attachments to Task field, select “Record details of the support request“.
In the Comments field, manually write “Additional comments added by” and then add “Fields Full Name” via the dropdown. Underneath, add “Fields Comments and Questions“. This pushes any extra comments from the submitter to the task’s comment section and also provides context.
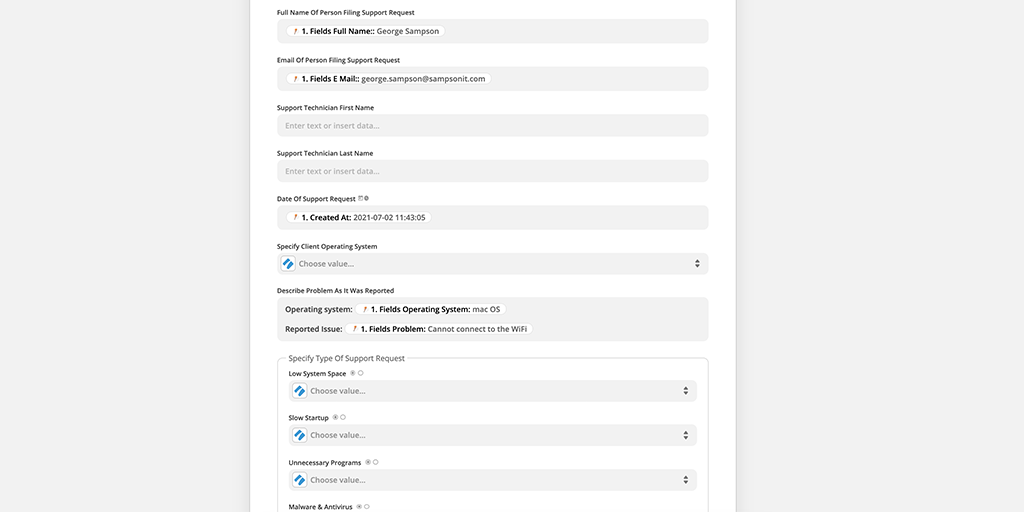
For the “Full name of the person…” field, you’ll want to select “Fields Full Name” from the dropdown.
As for the “Email of person filing support request”, choose “Fields E Mail“.
Under the “Date of support request” field, choose “Created At“.
For the last field we’ll be pushing data to in this use case – the “Describe problem as it was reported” field – I’ve manually written “Operating System:” and “Reported Issue:“, then added “Fields Operating System” and “Fields Problem“, underneath their respective headers.
To ensure the workflow run has been set up correctly, send a test to Process Street via Zapier.
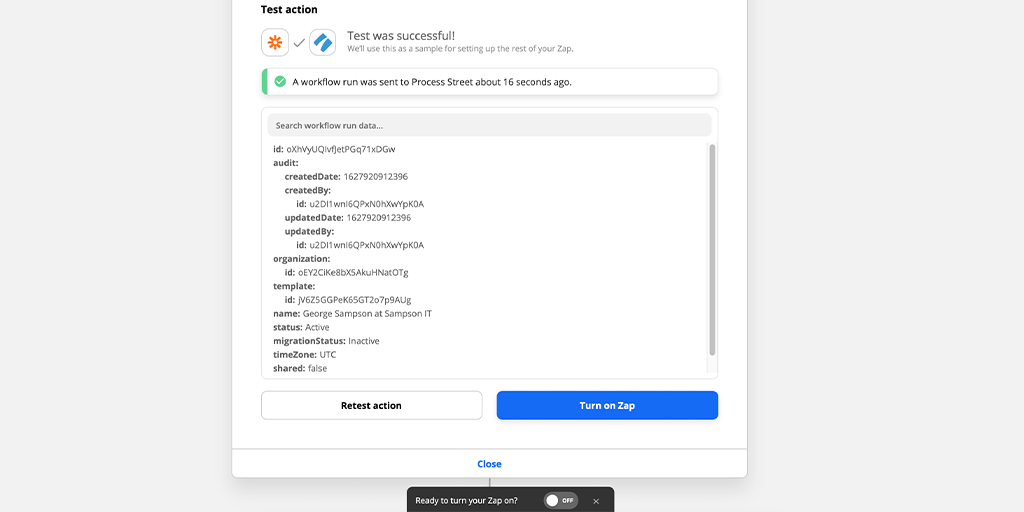
Once it’s been sent, a green banner will appear telling you the test was successfully sent.
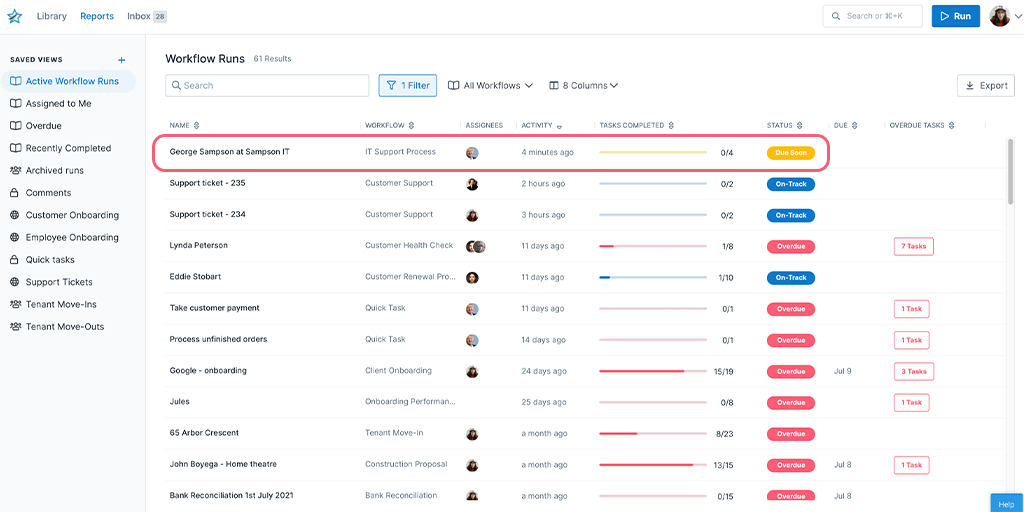
Find the test workflow run in the Reports area of the Process Street.
By clicking on the workflow run, then clicking “show more” on the left-hand side, and then navigating to the “Record details of the support request” task – task 4 – you should see the pushed-through data.
Success! Your Zap has now been built.
Remember, you can add, remove, or change form fields and data points in either the JotForm template or the Process Street workflow, so you can push through the exact data you need.
Before wrapping up, make sure to name the Zap. I’ve titled it “JotForm + PS: Technical Issue Submissions”. However, you can name yours whatever you wish.
Additionally, ensure the Zap is live. To do this, ensure the slider has been switched to “On“.
Help us improve this help center.


