This is a great feature for anyone needing to create lots of workflow runs in bulk, all at once.
Not only can you quickly create a batch of workflow runs, you can add an assignee, a due date, and also fill out form field data within your workflow runs, which is where this feature becomes really powerful.
You can use form field data to dynamically assign users to tasks, trigger conditional logic to show or hide tasks or content, or trigger dynamic due dates.
Running multiple workflows in this way not only saves you heaps of time, but also reduces data entry error, and allows you to collaborate on processes with however many users or departments you need.
Users: Admins and Members with “Edit”, “View All” or “Run” permission can create multiple workflow runs.
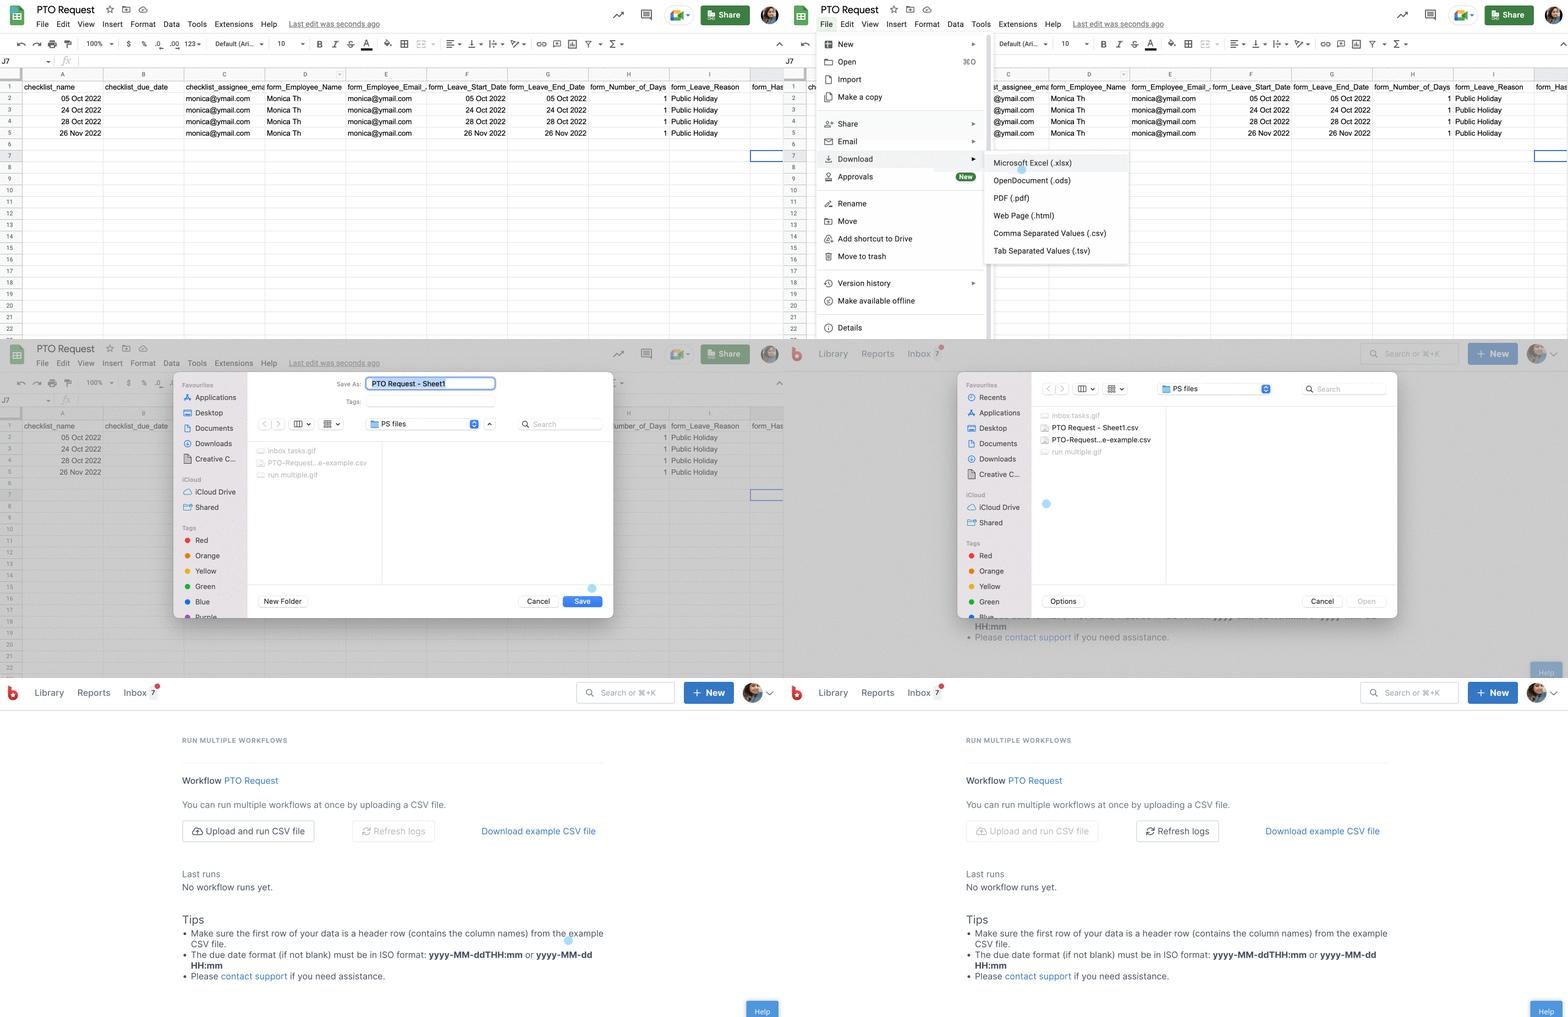
First things first, head to the workflow you’d like to run. Click the three dots next to its name and select Run multiple. If you’re in a workflow’s dashboard, click Run multiple in the right panel. Then download the example CSV file and add it to a spreadsheet in Google Sheets or Excel.

The CSV contains that specific workflow’s form fields, as well as fields for checklist (workflow run) name, checklist (workflow run) due date, and the checklist (workflow run) assignee’s email address.
Your CSV must include a header row, which you will see once you’ve added it to your sheet. Enter all your data below the header row, as shown below.

Workflow run due dates, where used, must be formatted and must include a time, in ISO format YYYY-MM-DD hh:mm, for example, 2021-04-10 19:00.
Form field due dates do not have to have the time included, these could also be left blank depending on your use case.
Note: Due dates need to be set in the future.
For multi-choice fields, separate your data values with a comma.
For members form fields, add a user email address.
If you are using task assignees instead of workflow run assignees, or task due dates instead of workflow run due dates, you can leave these fields blank.
Next, you need to download or save your completed sheet as a CSV and upload it to Process Street from the place you left off from earlier, as shown below.

Note: When you save your file as a CSV, ensure that you use a comma (,) as a separator as we don’t support a semicolon (;) separator.
Click “Refresh logs” to see that your upload has been successful or head to your Reports tab to see your new workflow runs.
If any workflow runs have been assigned to you, you will see these in My Work.
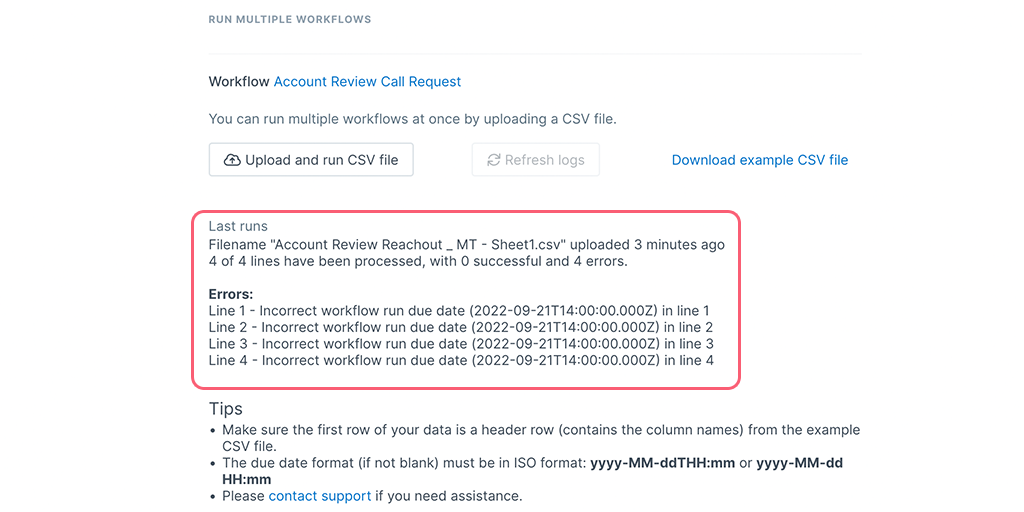
Don’t see your runs in the Reports tab? Head back to the page where you uploaded the CSV file to Run Multiple workflows to look for error logs.

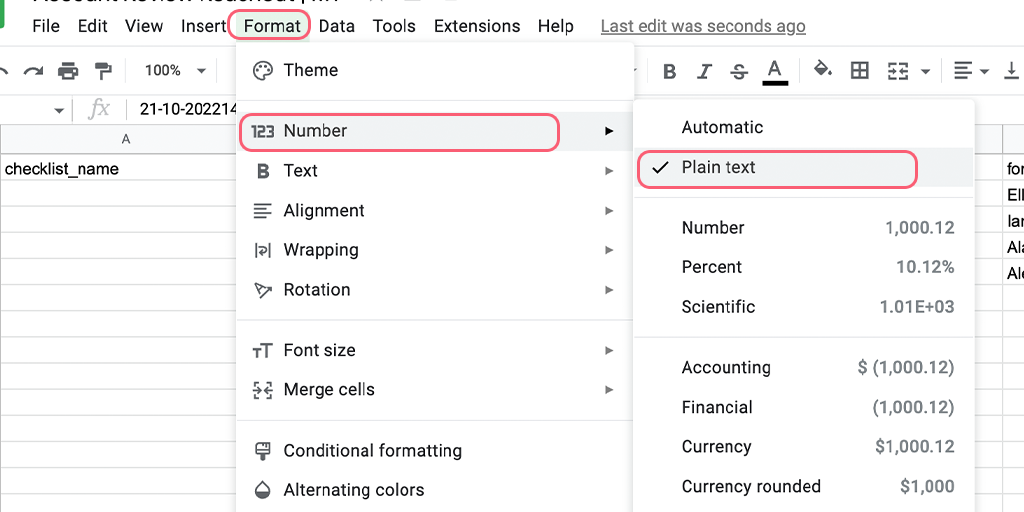
If you see the same error as above, go back to your Google Sheet, reset the due date in the ISO format and set the format as Plain Text.

Pro tip: In case you make any changes to the form field names in the header, the changes would not go through in your workflow. Change the form field names in your workflow by editing it then download the example CSV file from the Run Multiple page again.