The Image Widget allows you to add visuals like screenshots, graphics, or GIFs directly into your workflows.
Use it to guide users with visual instructions, display diagrams, or add branded elements such as your company logo.
Use images to:
Add clarity and visual appeal to your workflows
The image widget supports uploading of AVIF, BMP, GIF, HEIC/HEIF, ICO, JPG, PNG, TIFF, and WEBP file types up to 250MB for each individual file. Since there is no data limit on your account, you can add as many images as you need in your workflows.
Users: In order to add or edit image widgets in your workflows, you must be an Administrator or a Builder who has been given ‘edit’ access by your Administrator.
Start in your Library and look for the workflow to which you’d like to add images then click the Edit icon next to its name.
Next click on the task to which you’d like to add an image, then drag and drop or click the “Image” widget from the right-hand content menu.
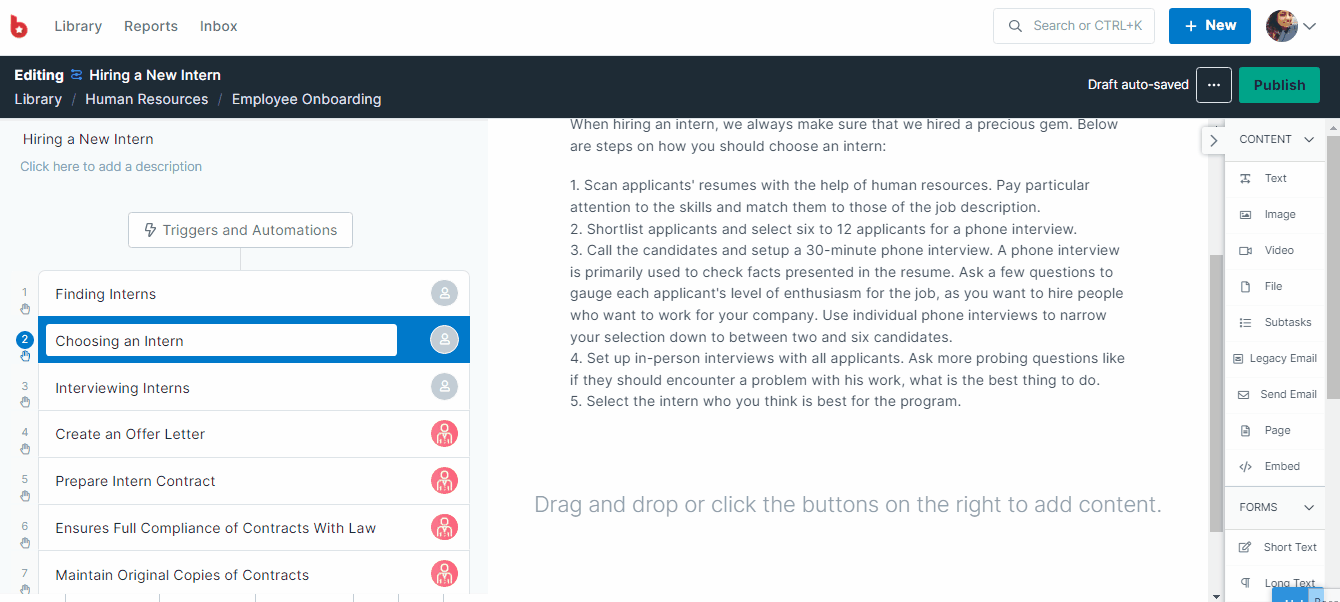
This will create an empty image widget at the bottom of the task you are viewing. Click the “Upload an image” button to upload your image of choice. Add your image, add an optional caption underneath it, then save changes to your workflow to finish.
Pro tip: You can add an image by dragging and dropping, or copying and pasting it into your workflow whilst you are working in the editor. Just make sure to click on the task area (in the editor) before pasting the image. Also, use the shortcuts to copy/paste, for example, Command/Control C + command V.
Taller images will take up a lot of space in your workflow, so it’s best to use landscape format images, instead of portrait.
Note that it’s not possible to resize the images once they have been uploaded into your workflows. Aim for an aspect ratio of 16:9 and these will resize comfortably once you have uploaded them.
Learn more about how the other widgets work:
Help us improve this help center.


