Subtasks help break complex tasks into smaller, trackable steps within your workflow runs.
They’re especially useful when you need to guide users through a list of required actions without additional instructions.
You can also set subtasks as required fields, requiring users to complete each item before proceeding to the next task.
Users: You must be an Administrator or a Builder who has been given ‘edit’ access to add or modify subtasks in workflows.
Subtasks are checklist-style items that live inside a single task. They’re perfect for:
You must be editing a workflow to use the subtask widget or any other widget.
You can edit a workflow by clicking its name and clicking “Edit” in the top center of the screen.
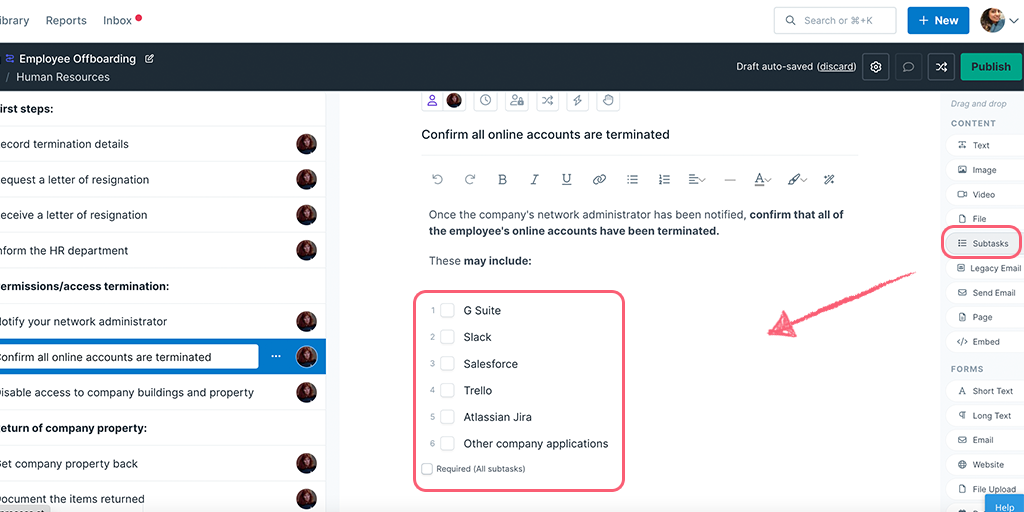
Click on the task you want to add a subtask to, then cast your eye to the right-hand widget menu.
In the Content section of your editor, you can add subtasks by clicking the name “Subtasks“, or drag and drop it into place in the center of your screen.
Start typing in the empty fields to add details.
Pro tip: You can copy a list of subtasks from a Google doc, Word doc, or spreadsheet straight into the blank fields of your subtasks, to help populate them quickly. Extra rows will be created automatically for the size of the list you paste in.
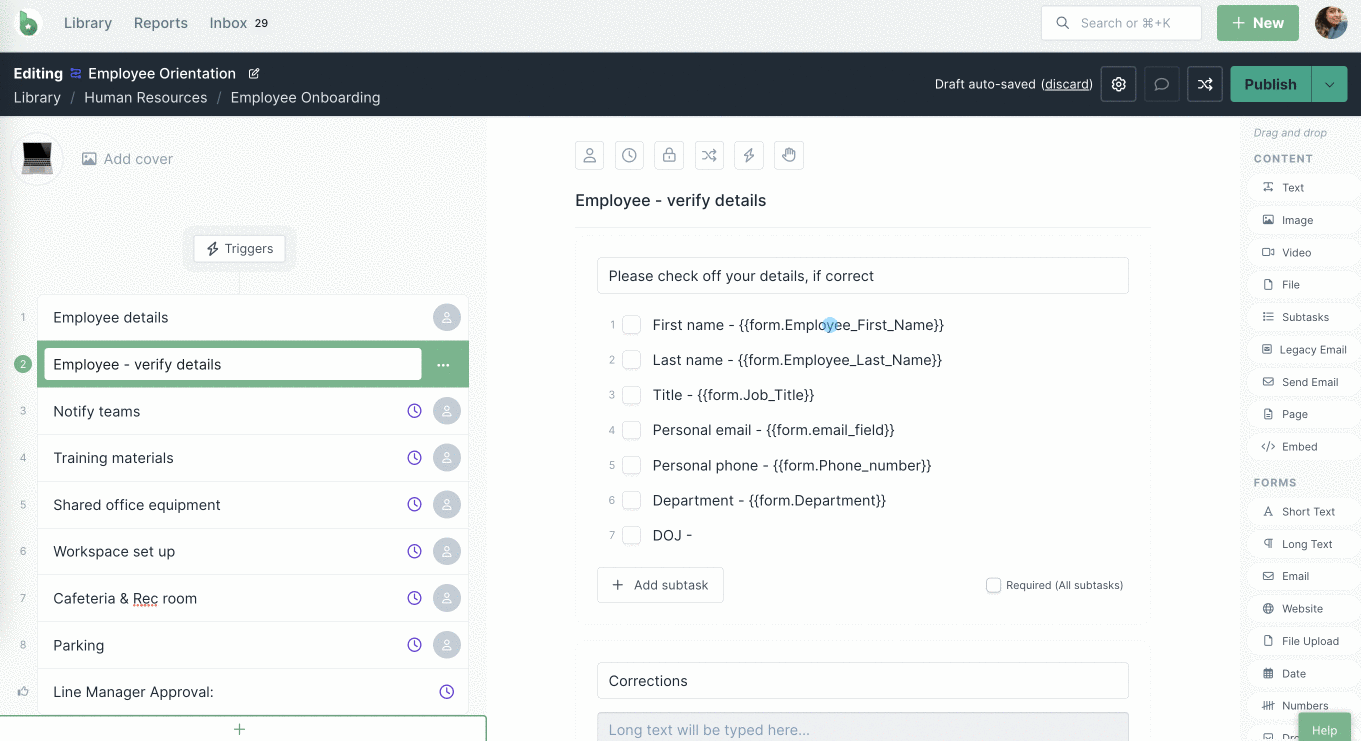
Create dynamic workflows with customized information by adding variables in your subtasks.
You can populate your subtasks using the variables from your workflow, just like you would in a text field. Click on the magic wand icon next to each subtask and select an option from the available variables.
Adding links and files in your subtasks helps your users to easily and quickly access references, with minimal navigation.
To add a link in the subtask, you can directly paste it into the desired field.
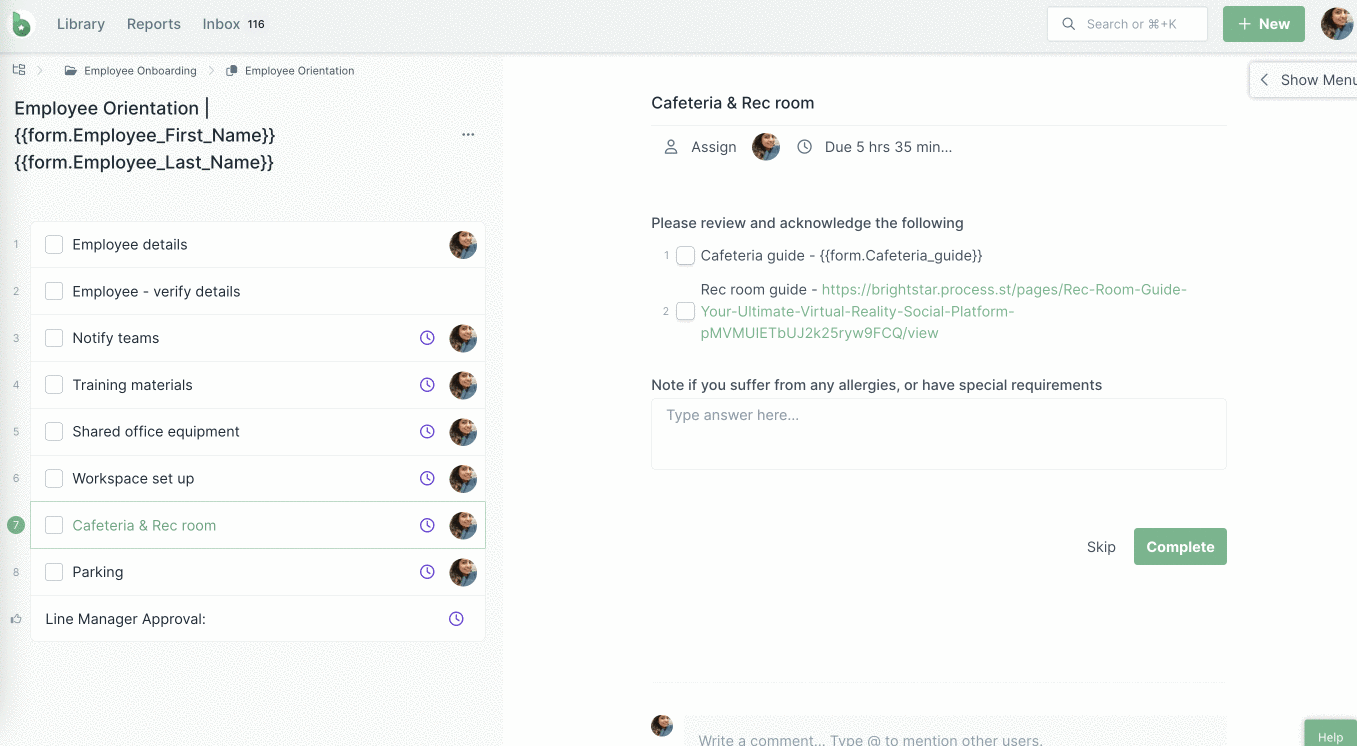
If you want to display an uploaded file from your workflow as a subtask, you can add the file upload variable to your subtask. This file will display as a URL in your subtask, as shown above.
When you first add the subtask widget you’ll see three rows where you can start typing.
To add more rows, hit your “Enter” key to add another task to the subtask list. Keep hitting enter until you have enough subtasks for your needs, as shown below.
Note that you cannot create sub-tasks within sub-tasks, but you can use separate subtask widgets if you’d like to split out some of your sub-tasks into different groups or have some mandatory and others not.
If you need less than the default three subtasks that appear when you first add a subtask widget, you can delete them with your backspace or delete key.
Or if you’d like to delete an existing field, you will need to delete any words in the subtask row first, then hit your “Backspace” key or delete key to delete the entire row.
You can drag and drop individual subtask line items once you have created them, to change their order in the list.
Underneath your subtasks, you’ll see a small checkbox that you can tick to ensure that all the subtasks are completed when you run the workflow.
This means that all the checkboxes need to be completed before you can complete this particular task.
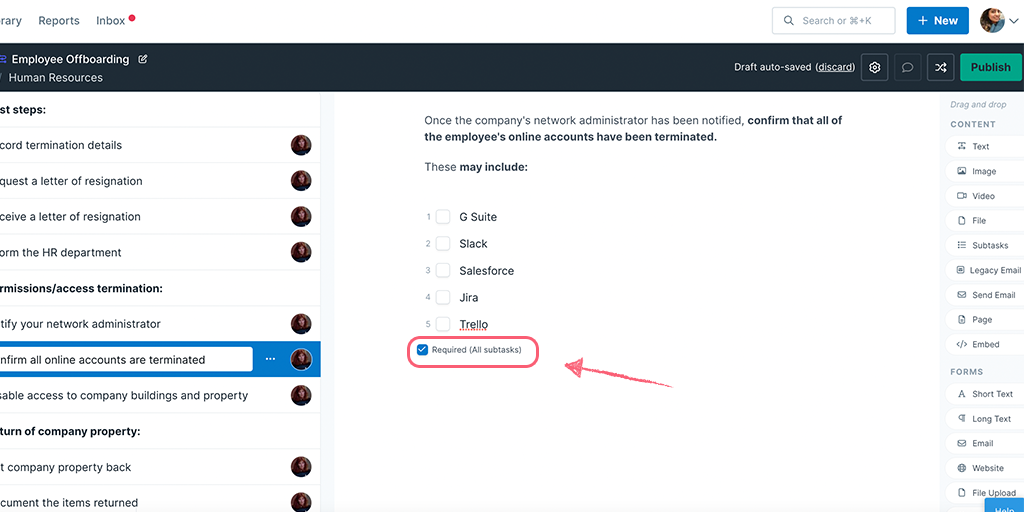
If the subtasks in your workflow runs are required fields, you will see a red asterisk * next to each one.
Notice the red warning highlights and flash notification when you try to complete a task, without first completing all the required fields:
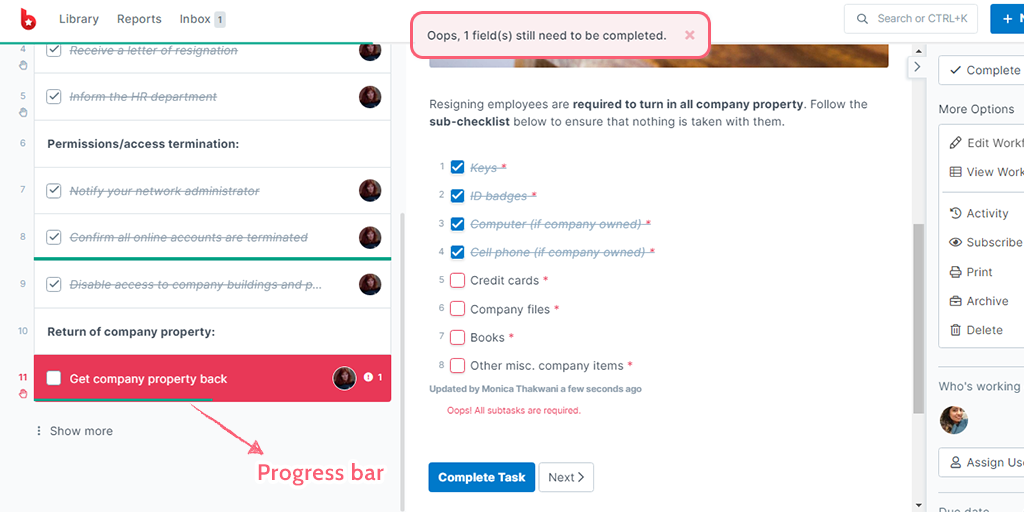
You can also see a progress bar in the task on the left side of your screen, which indicates what percentage of the subtasks have been completed.
As soon as you have completed all the required subtasks, you can then complete the task and continue with the rest of the tasks in your workflow run.
Of course, if you choose not to make your subtasks required fields, then that’s fine. You could even create some that are required and add another set of subtasks that aren’t required. The choice is yours!
Learn more about how the other workflow-building widgets work:
Help us improve this help center.


