You can export all workflow runs into a CSV (comma separated value) file.
This is a great way to create spreadsheet-friendly reports of all of the data you capture in your Process Street workflow runs.
Your CSV file can show all of your active, completed or archived workflow runs, with columns for each task, the status of the workflow run, each form field, the assignees, and whatever other fields you choose to show.
Users: Admins and Members can export workflow runs as a CSV.
There are two ways you can export your workflow runs as a CSV file:
Exporting from your Reports area allows you the most flexibility of these two options. You can select which workflow runs you would like to export from any workflow in your organization, and from any of your saved views. You can also select which columns you would like to export, or you can export all columns to capture all of your workflow run data.
First, click “Reports” at the top of your screen. Select a saved view from the left-hand menu and then click on the export button on the right side of your screen (shown below).
Choose either “export all columns” or “export only visible columns”. Once you click the Export CSV button, your CSV will automatically start downloading within your current browser.
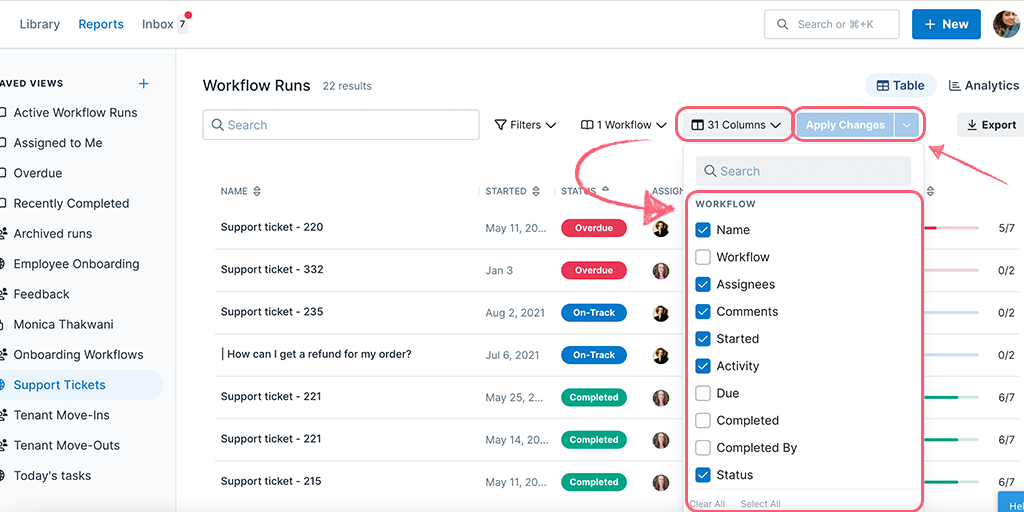
To select more columns or to change the columns in this view, click the dropdown button shown below. Check the boxes of the column headers you’d like to see, un-check the ones you don’t want to see and then click “Apply Changes” when finished.
Note: Time zones for all dates included in CSV exports are in UTC. To convert the UTC to your local time, you can do this inside your Google Sheet or Excel Sheet by using the formula below. Learn more about managing time zones.
First, split out the time from the date, using the “text to columns” feature in your sheet. You can then apply the formula to add or subtract the number of hours difference from UTC, to convert it to your local time.
To convert from UTC to CST (UTC -6 hours) use the formula =A1-TIME(6, 0, 0) or to convert from UTC to IST (UTC +5 hours 30 minutes) use the formula =A1+TIME(5, 30, 0). Change “A1” to the cell number you want to convert.
Exporting from a workflow’s menu is a quick way to access the “export all columns” feature, without having to navigate away from your workflow. If you would like to choose which columns are visible first, before exporting, then you’ll want to export from your Reports area instead (see above).
First, you will need to open your workflow’s menu. To do this, start in your Library, look for the workflow you would like to export data from and click the three dots next to its name to open the dropdown menu.
Scroll down and click “Export“. Click the green button to export all the active workflow runs including all the tasks and data in those tasks.
Once you’ve made your selection, your CSV will automatically start downloading within your current browser.
The example below shows how you can use the CSV file you downloaded to import the data into a Google Sheet.
You can also add CSV files into Excel sheets.
Learn more about Running workflows, Form fields, Editing workflows and Reports.