You can integrate Process Street with other workflows, workflow runs and Data Sets in Process Street, using our Automations.
This integration allows you to create workflow runs or data set records automatically, either when a task is checked or when a workflow run is complete. You can map and pre-fill data from one workflow run into another.
You can also add information collected in your workflow runs to add or update records in your Data Sets.
Users: In order to create or update Automations, you must be an Administrator or a Member with “edit” permissions.
Before you get started you’ll need to have a few form fields set up in your Process Street workflows. Workflow 1 is the workflow you will run the automation from, and workflow 2 is the workflow you’d like to run
Now you’re ready to go ahead and start creating your automation!
Head to your library and open up workflow 1 by clicking its name then click Edit in the top-right corner. This will be the workflow that you create the automation from.
Start by selecting the trigger for your automation. You can choose from these two triggers:
Let’s walk through examples for each of these triggers and their respective actions.
In this example, completing the task “Confirm move-out date” in your Tenant Move-Out process creates a new “Property deep clean” workflow run for your property manager to complete.
Let’s start by navigating to the chosen task. In our example, we’re moving to the task “Confirm move-out date”. Then click the three-dot menu next to the task name and select Automate.
Alternatively, you can click the lightning bolt icon in the center of your screen when you have selected the chosen task for this automation.
Next, select the Process Street app and a small tick will appear to confirm your selection.
Select the action “run a workflow”.
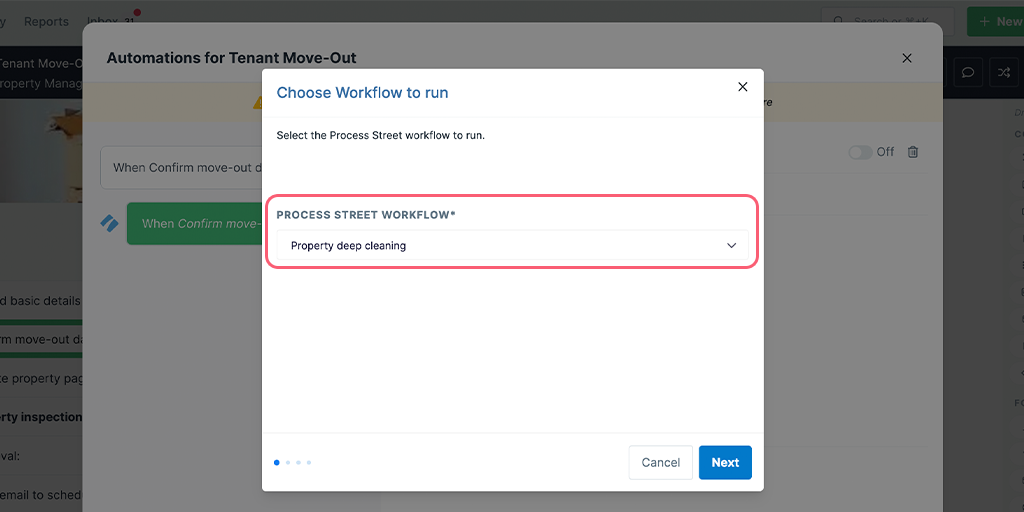
Choose the workflow you would like to run a workflow from (e.g. Workflow 2). Click “Next“.
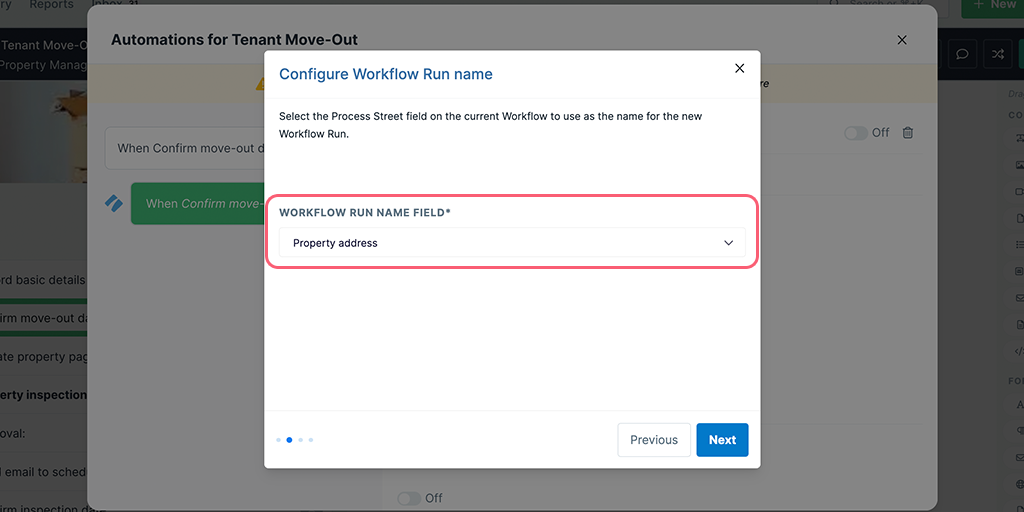
Select the field that you would like to use as your workflow run name.
You can only use one field to create your workflow run’s name, however, you could use a snippet form field to allow you to add text or variables into its name.
Next, you need to map the fields from your first workflow run, that you would like to fill out automatically in your second workflow run.
These could be global variable fields like Workflow Run Name, Workflow Run URL, Task Name, they could be the names of form fields that you have added into your workflow. If you have connected a dropdown field with a data set, you can also map data set variables into the new workflow run.
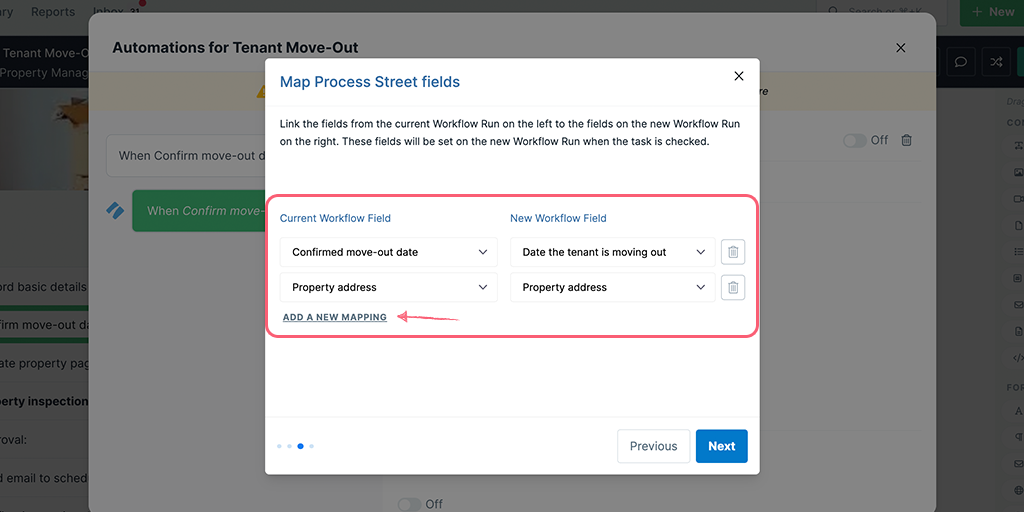
Click “Add new mapping” to map more fields from your original workflow run into your new workflow run. When you’re done mapping fields, click “Next”.
Optional: If you would like to capture the URL of your newly created workflow run, in your original workflow run, you can do that by adding a placeholder form field into it (a short text form field would be ideal).
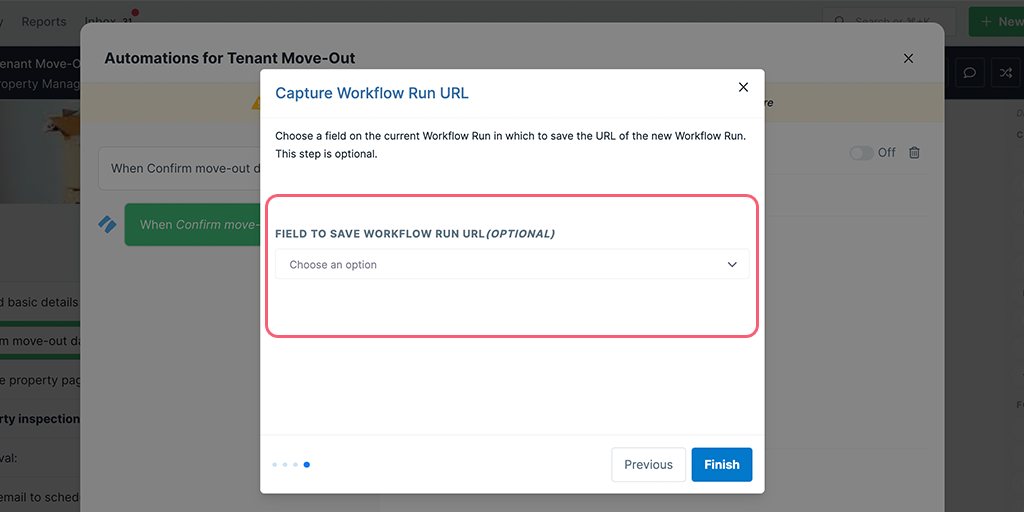
Once that’s added, you can use this step to capture your new workflow run’s URL, or if you prefer to skip this part, click “Finish”.
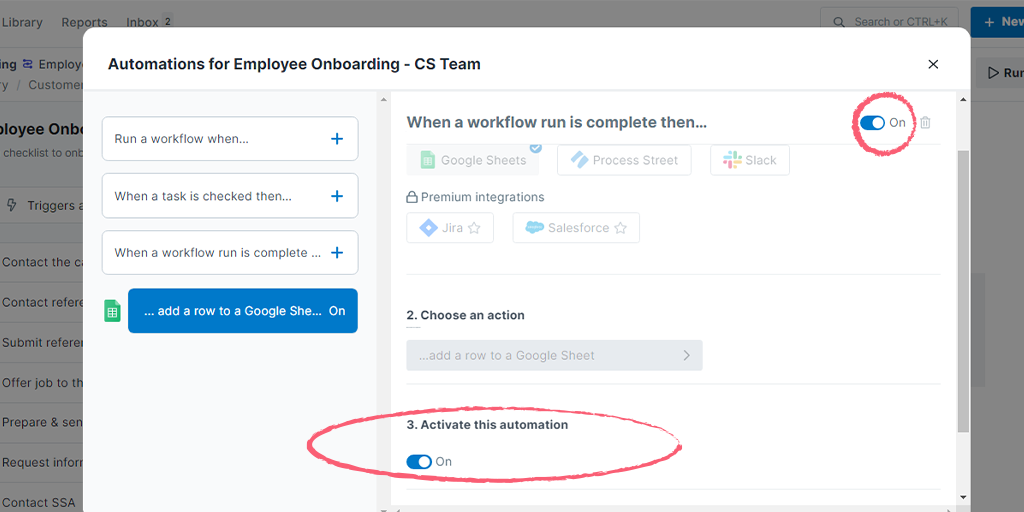
Now you’re ready to turn on your automation. Use one of the toggle switches shown below, to switch it on.
Now every time your task is checked, a workflow is run and pre-filled with the data you have mapped from your original workflow run. Plus, since we used dynamic due dates in the second workflow run, these are automatically populated as soon as the second workflow run becomes active.
In this example, completing a workflow run from your Employee Onboarding Process creates a new record in the data set “Employees”.
Let’s start by navigating to the bottom of your task list on the left. Then click the + icon below the last task and select Automations. Then select Process Street from the app list on the left of the pop-up modal.
Select the Process Street app and a small tick will appear to confirm your selection.
Select the action “create a data set record”.
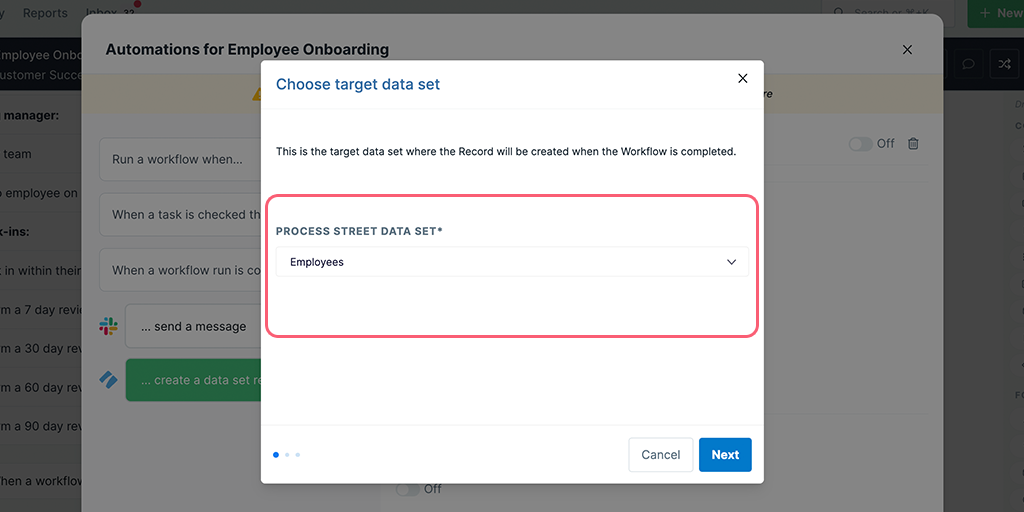
Choose the data set where you would like to create a record. In our example, we’re choosing the data set “Employees“. Click “Next“.
Next, you need to map the fields from your workflow run, that you would like to fill out automatically in your data set record fields.
These could be global variable fields like Workflow Run Name, Workflow Run URL, Task Name or they could be the names of form fields that you have added into your workflow.
If you have connected a dropdown field with a data set in your workflow, you can also map data set variables into the record fields. (This would be like mapping fields from one data set to another.)
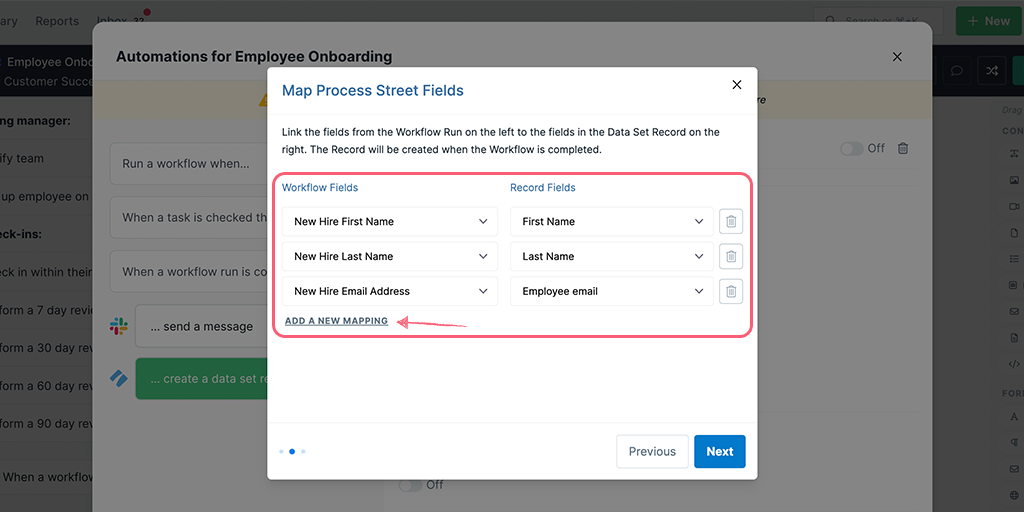
Click “Add new mapping” to map more fields from your workflow run into your data set record. When you’re done mapping fields, click “Next”.
Optional: If you would like to capture the record ID of your newly created data set record, in your workflow run, you can do that by adding a placeholder form field into it (a short text form field would be ideal).
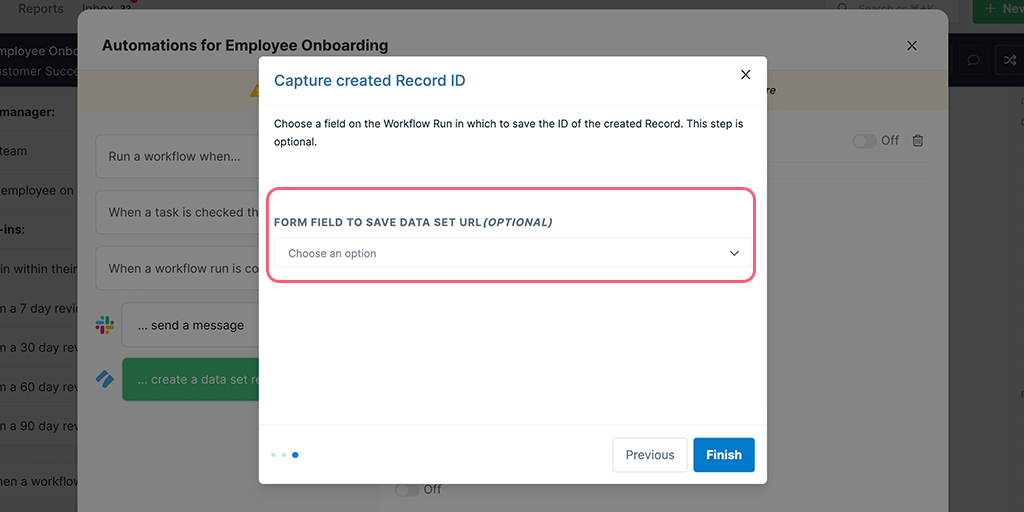
Once that’s added, you can use this step to capture your new workflow run’s URL, or if you prefer to skip this part, click “Finish”.
Now you’re ready to turn on your automation. Use one of the toggle switches shown below, to switch it on.
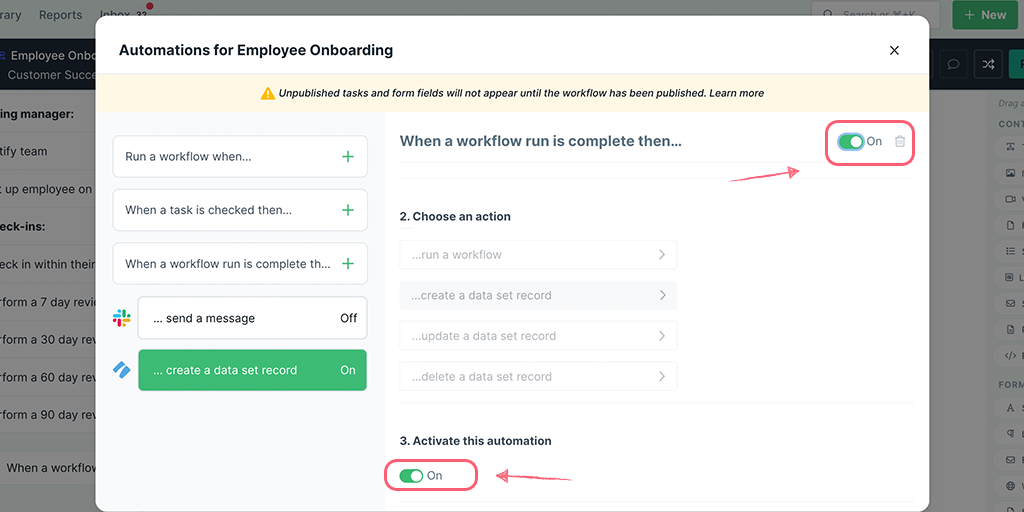
Now every time one workflow run is completed, a new record will be added to your data set with pre-filled information that you have mapped from your run.
To allow you to create workflow run names with more than one field of data passed into your new workflow run, you might consider using a snippet form field. This allows you to create workflow run names such as [employee first name] + [employee last name] + [job role] or [company name] + [customer ID number] for example.
Process Street also has a number of other built-in features you might want to use to help streamline your processes. You can schedule when a workflow runs, for recurring or one-off events by using our scheduling tool, use variables to push data into, out of, and around your workflow runs.
The email widget allows you to send pre-drafted emails direct from your workflow run, with variable data automatically filled out and ready to send.
To be able to edit the fields you have mapped in your automation, or change the triggers or actions, you first need to turn off your automation using one of the toggle switches.
To remove an automation from a workflow, you can delete it, but first, you will need to ensure that it has been switched off. Turn the toggle switch to the “off” position and then click the trashcan icon in the top right of your view to delete the automation.
There are no filters, delays, or formulas built into automations. To be able to utilize these types of functions, you might want to consider using a Zapier integration instead.
If you would like to request that we add another app to our automations, you can do that from the help button in the bottom right corner of your screen. Click “Suggestions” and send us your request.
If your automation stopped running, isn’t working as expected, or is showing errors, there might be a few reasons for this. Please check the following:
You can check your automation run logs to see how your automations are running, or check for errors. You will find the automation run logs in two places, on workflows or on workflow runs.
In a workflow, when viewing it in Edit mode, the tasks with an automation display the connected app’s logo next to the task name. Select an existing automation by clicking the desired app logo in the task list. At the bottom of your page, you will see the run log for this automation.
In a workflow run, in the upper right-hand corner of your task list, you’ll see the lightning bolt icon![]() . Click the icon to see the run logs for that particular workflow run.
. Click the icon to see the run logs for that particular workflow run.
If you have any errors, click the word “Error” to expand more information on why your automation didn’t run.
The lightning bolt icon will only show up on workflow runs that have automations configured on them. This is an automation’s idle state.
When an automation is running, you’ll see the bolt change to the ![]() icon.
icon.
Once the automation finishes running, you’ll see either ![]() for success or
for success or ![]() for failure. If it’s a failure, you can click on the X to see the run logs and then click on the “Error” log for more information.
for failure. If it’s a failure, you can click on the X to see the run logs and then click on the “Error” log for more information.
If you have any questions about using Automations, please reach out to our Process pros team.