Sharing your Workflows, Workflow Runs, Forms, or Pages with others, either within your team or with external collaborators is simple.
What you share and what access they can have to it depends on their user type and the level of permission you have granted on the item you’re sharing.
You can change sharing settings to restrict access to an item just as easily as you can grant access. This allows you to keep some items private while others can be shared with your whole team.
To access the options for sharing a Workflow, first head to your Library and search for the Workflow you would like to share.
Next, click the three dots (…) next to the name of your Workflow to open the dropdown menu.
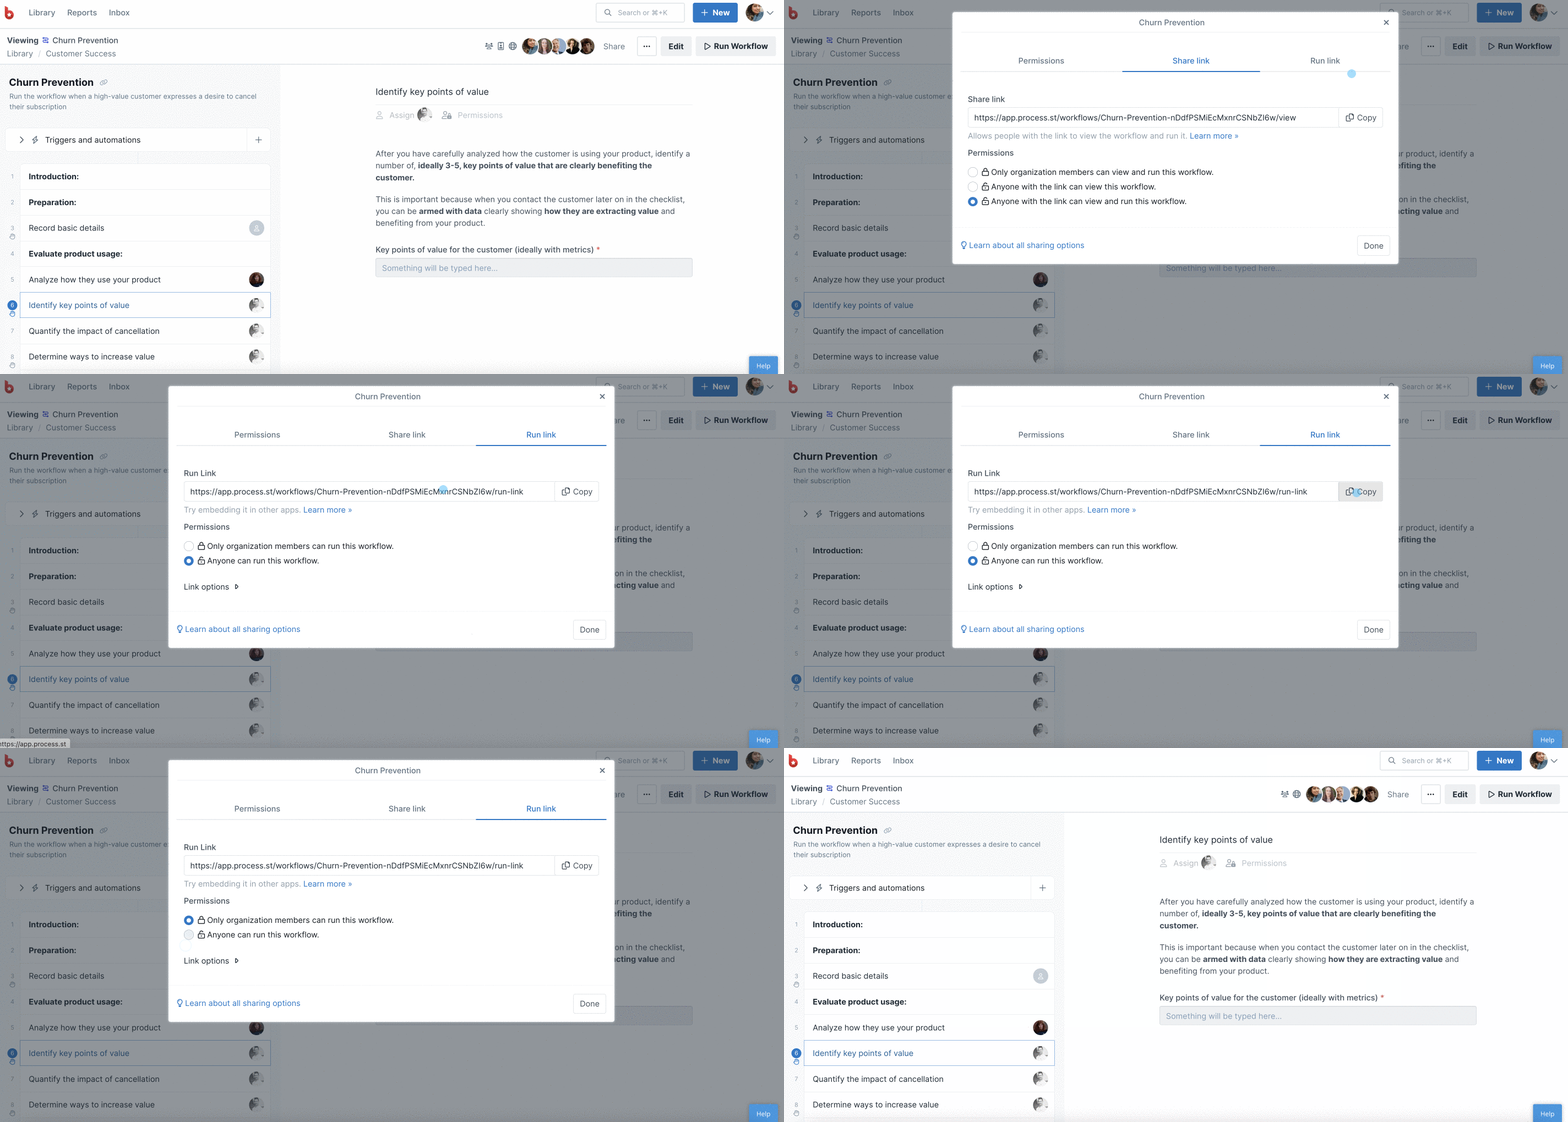
From there, click the “Share” button to bring up your sharing options. You will see three tabs, for “Permissions“, “Share Link” and “Run Link” as shown below.
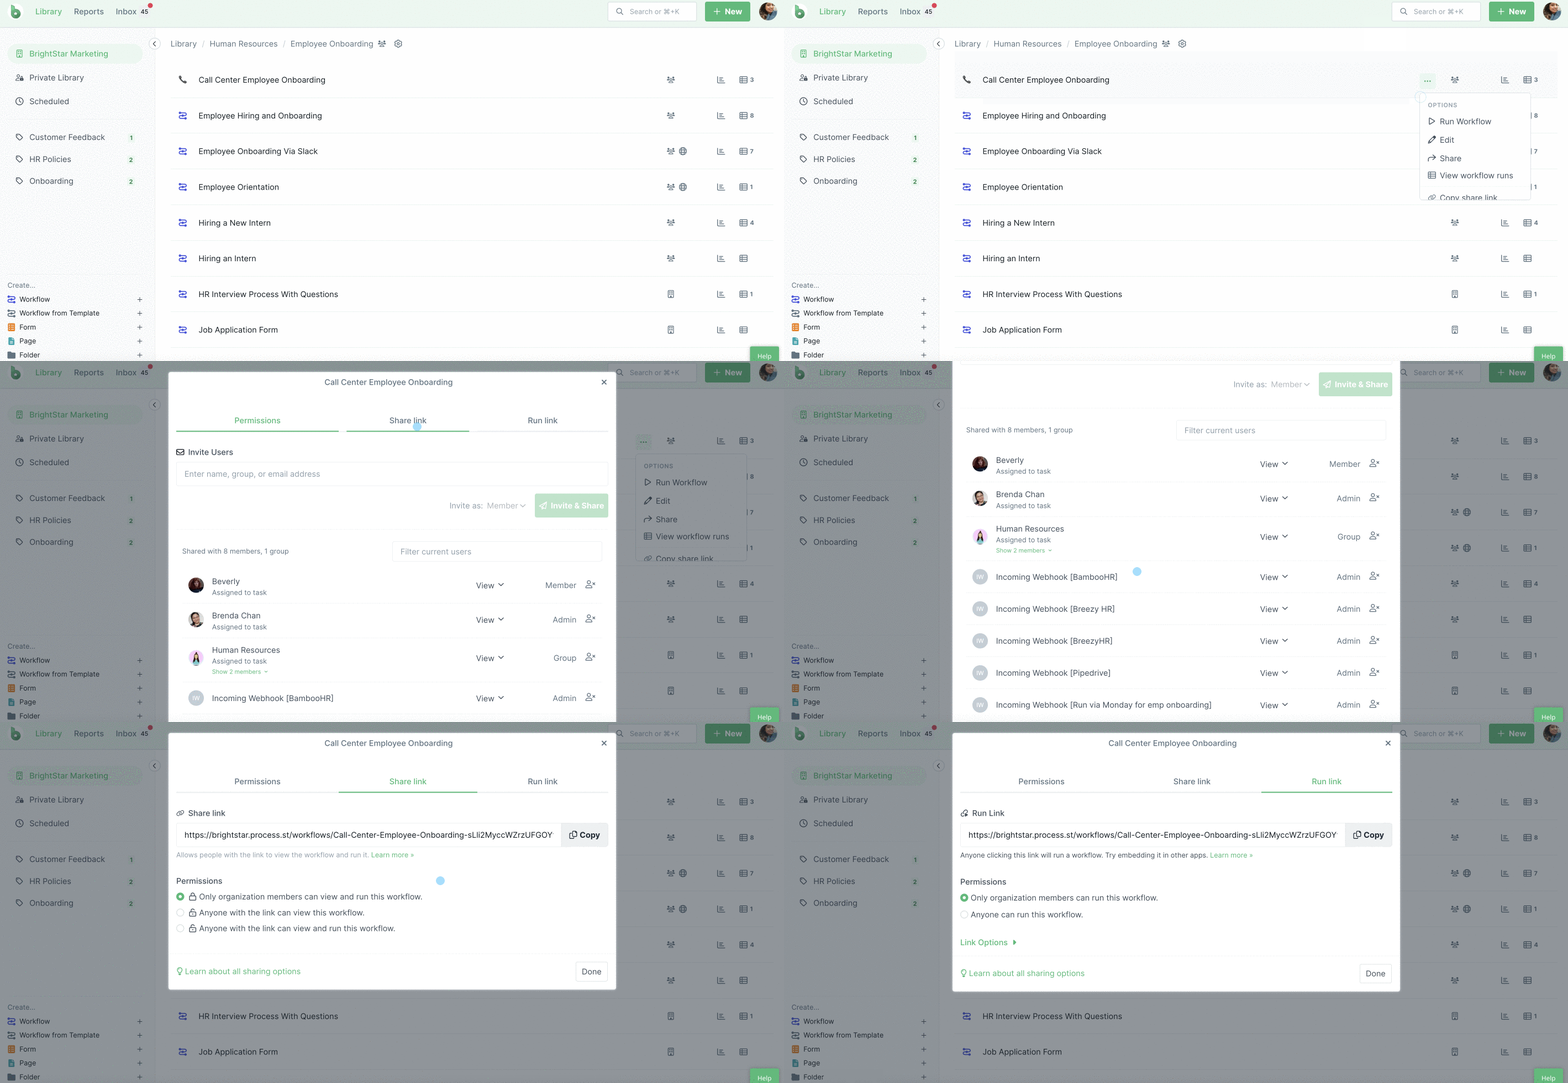
To assign new Guests (Internal or External), Members, or groups to a Workflow, click on the “Permissions” tab and type their name or email address into the field provided and click “Invite & Share” to add them. For existing users, type their name or email address and click enter (as shown below).
Next, you’ll need to consider how much access (or which permission level) you would like them to have on this Workflow.
Members or Groups that you assign to your Workflow can be given one of four permission levels, which you can select by using the dropdown shown above.
Here are the permission levels with the highest permission level at the top:
Guests (External) only ever have ‘View‘ permissions.
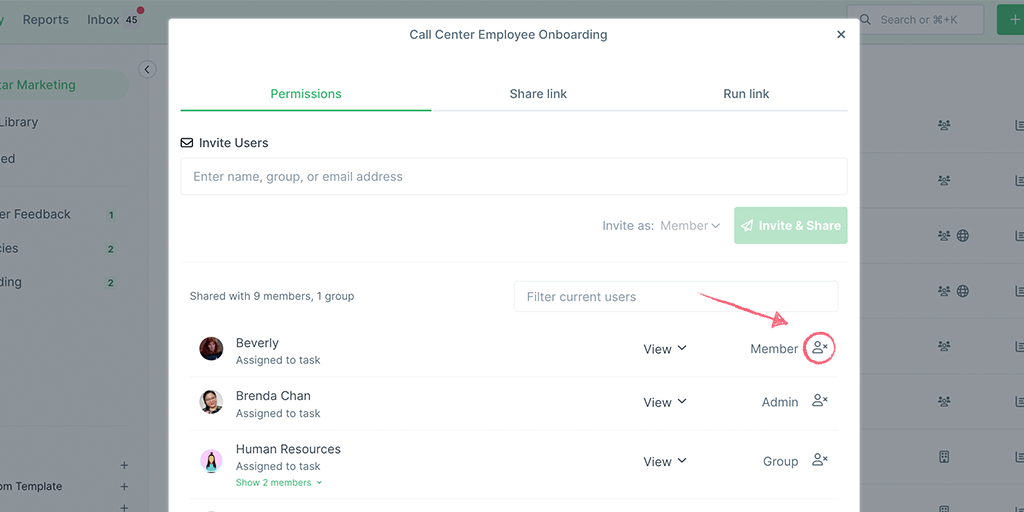
To remove a user or group from a Workflow, click the “Remove user” icon next to the user or group’s name, as shown below.
A Workflow share link allows you to share your Workflow with anyone inside or outside your organization.
Start from your Library or a folder, and click the Share button in the top bar. Then, click the second tab in the pop-up window “Share Link“.
Note: Share links are available only on the paid plans. If you’re unable to create a share link, please contact our support team.
Start by selecting one of the three different permission levels for the Workflow share link:
Once you have chosen the permission level that you prefer, copy the share link by clicking the “Copy” button and send it to whomever you like or use it in another Workflow to link your processes together.
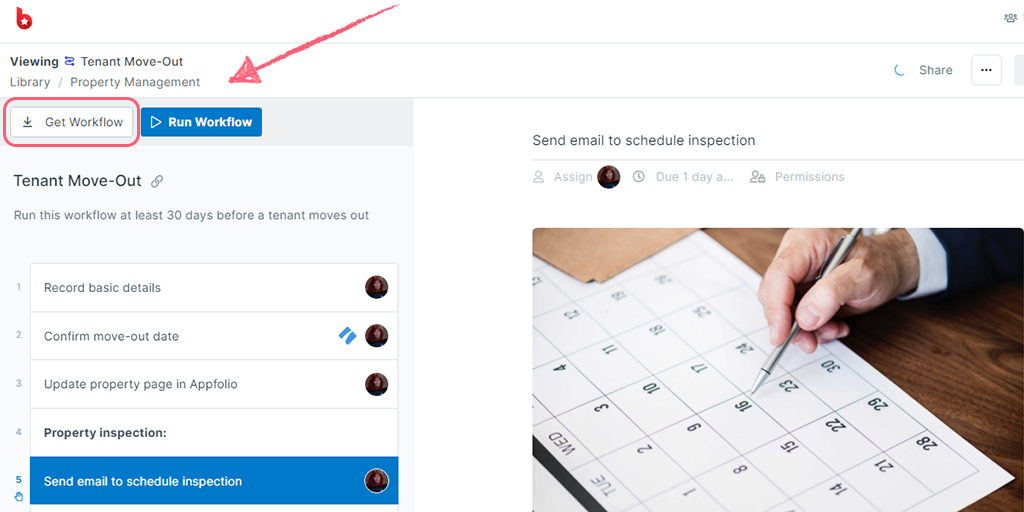
Users that you share this with outside your organization (with a Process Street account) can click “Get Workflow” to make a copy of the Workflow in their own organization, or run the Workflow. This depends on the permission you set for your share link.
Learn more about Workflow Share Links.
Workflow run links allow a user to run your Workflow by clicking a link.
Note: Run links are available only on the paid plans. If you’re unable to create a run link, please contact our support team.
To create a Workflow run link, select “Share” and click the third tab in the pop-up window “Run Link“.
Start by selecting one of the two different permission levels for the Run Link:
You can also add details into the run link so that some of the fields in your Workflow run are filled out when it is created. Learn how to do this when creating run links and using Integration Links.
If you would like your Workflows to be available on search engines, you can make them public. This option also allows you to embed your Workflow in a website or another app.
You can share Workflow runs with anyone on your team, or with external collaborators such as vendors, clients, freelancers, or customers.
Assign users to a Workflow run
You can give a user or group responsibility for your whole Workflow run by assigning them to it.
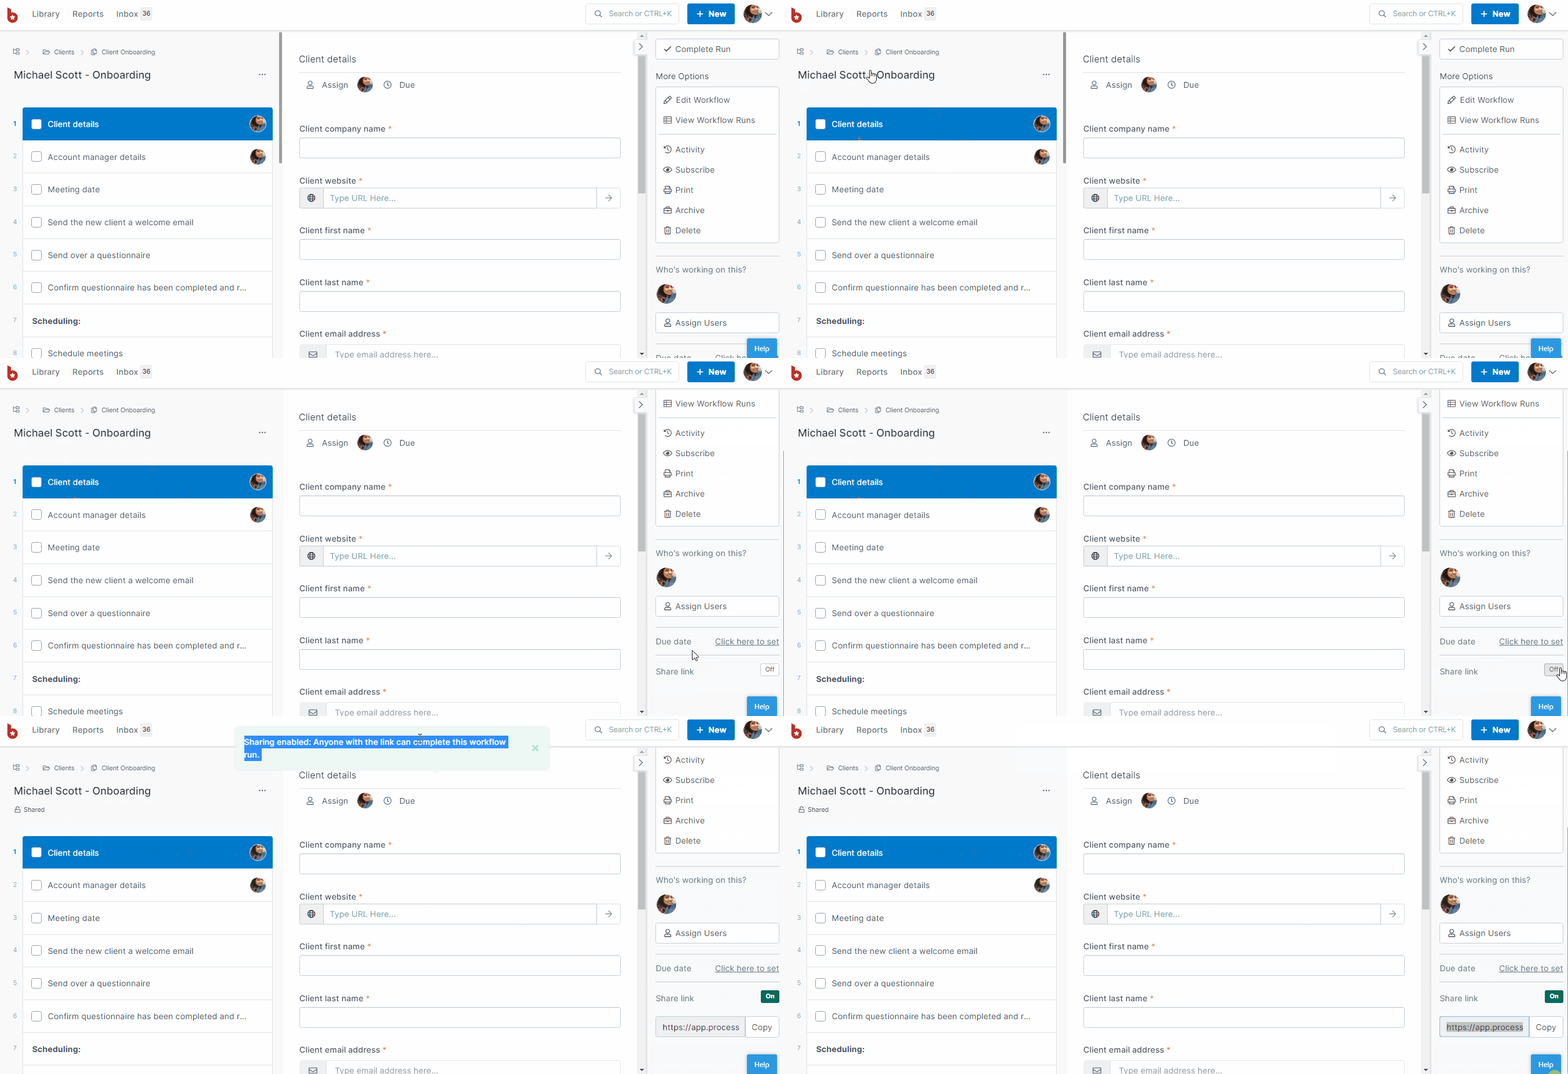
To share your Workflow run externally, you can turn on the share link.
Start from your Reports tab and search for the Workflow run you would like to share.
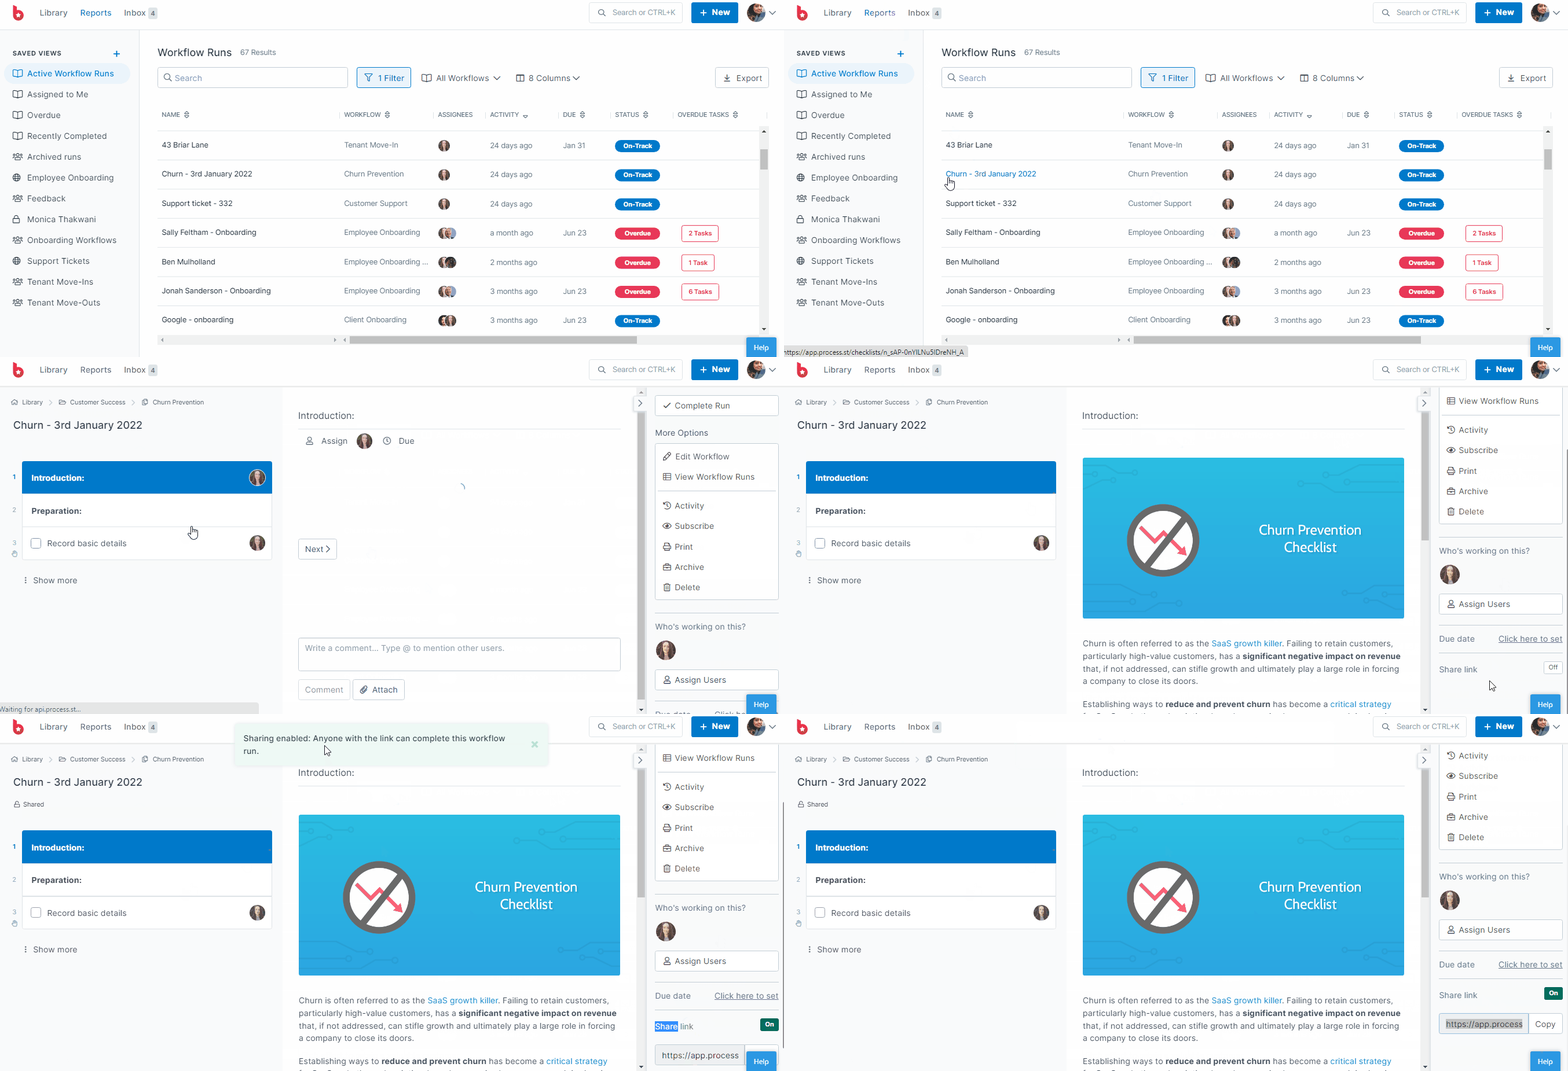
Open the Workflow run and hit the button next to the “Share link” button at the bottom of the right-hand menu. The default setting is “Off“, so click here to turn the share link “On” as shown above. Copy the link and send it to whomever you choose.
You can choose to keep the Workflow sharing On by default while creating or editing your Workflow.
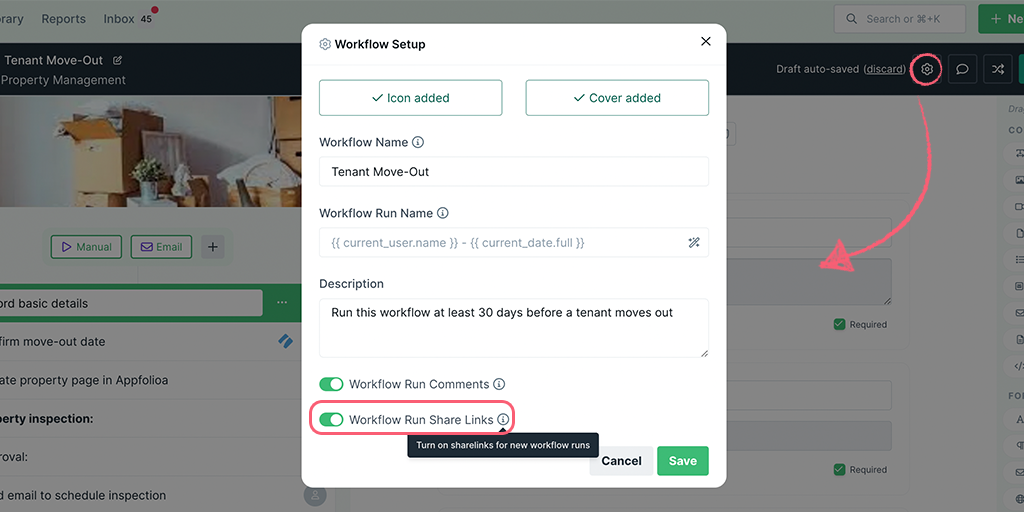
Learn more about Workflow run share links.
You can also turn on/off the visibility for tasks within your Workflow runs so that certain users only see the tasks you want to share and not your whole Workflow run.
Learn more about task permissions.
Once your Form is published and ready to be shared with the outside world, you can click on the Share icon in the top-right corner and copy the link.
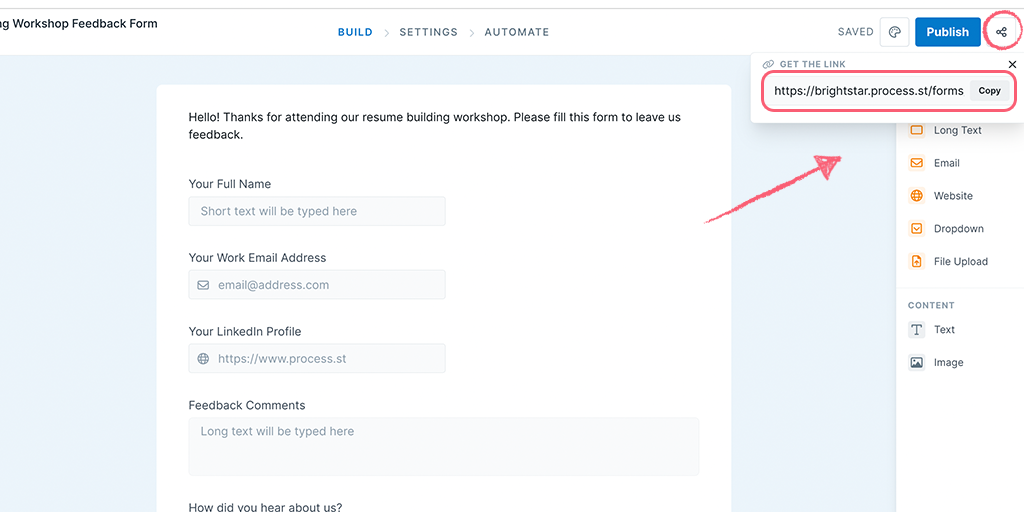
You can then hyperlink this link on your website, in your marketing emails, or share it with your clients as it is using which they can submit a response to your Form.
You can share your Pages in a similar way to your Workflows and Workflow runs, as shown below.
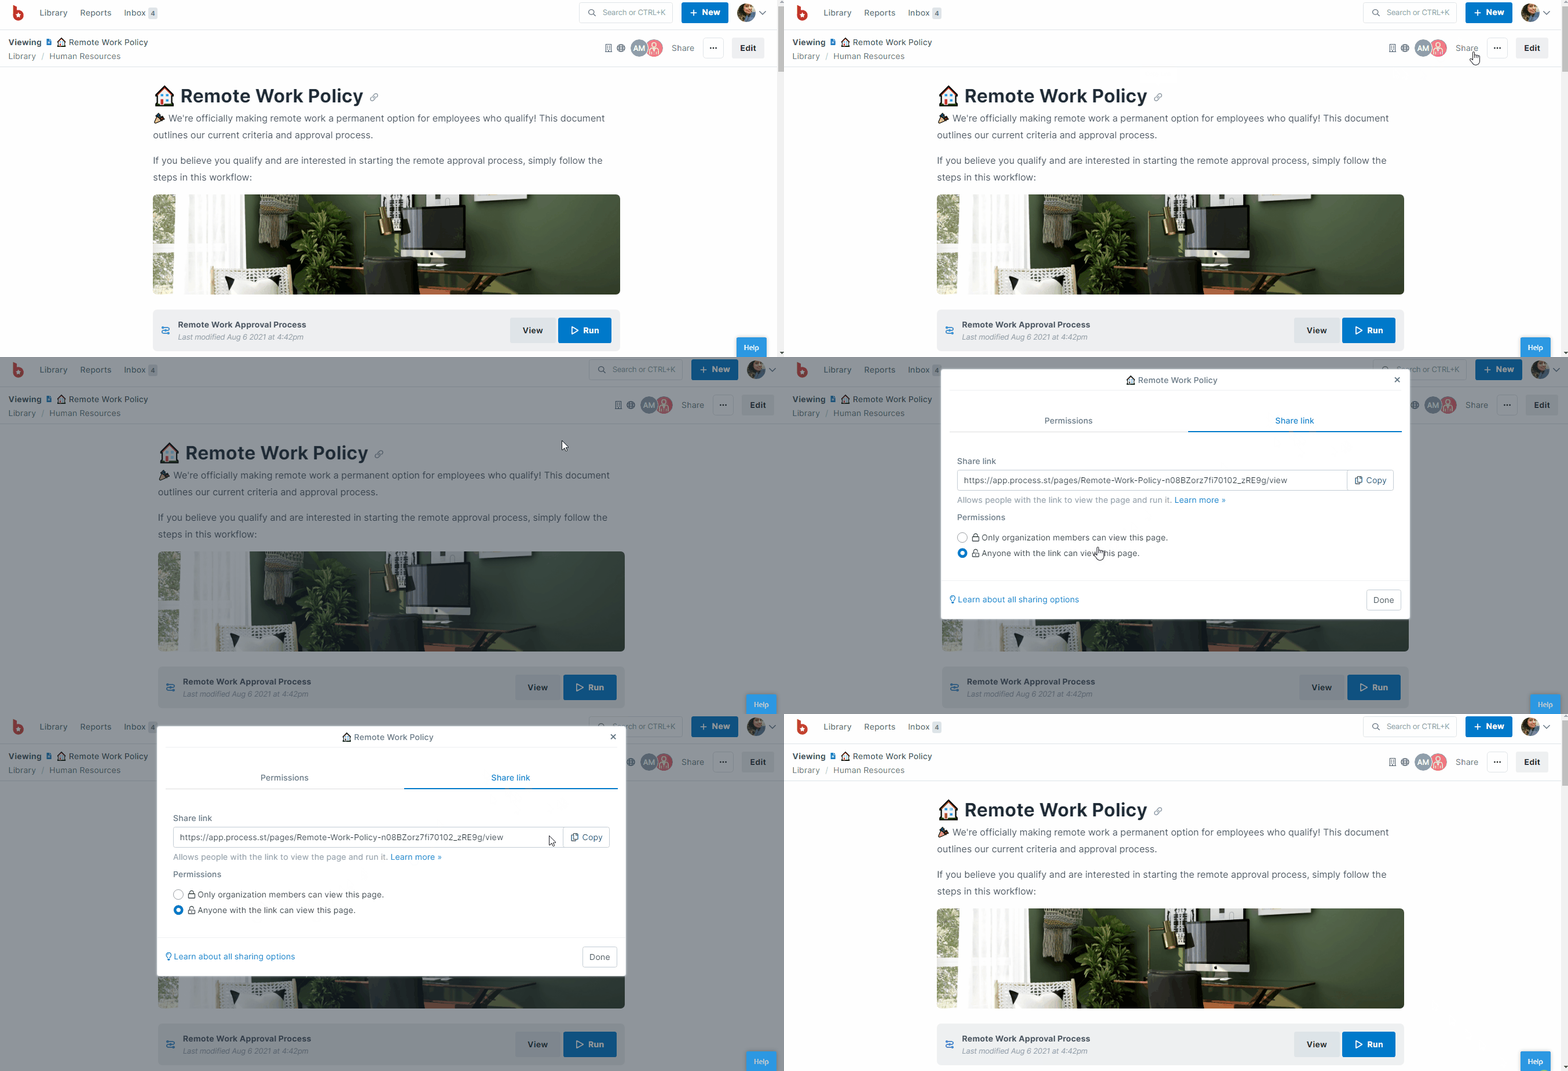
When setting permissions for users on Pages you can choose:
You can also share Pages in your Workflows and vice versa.
If you have shared items with a member of your organization or a guest for the first time, they might need to know how to use Process Street. You can share these articles with them, to help them get started: